Blog

  • Replacement Bow Windows: What They Are and Why Your Home Needs Them

    Replacement Bow Windows: What They Are and Why Your Home Needs Them

    Not loving how your current windows look or how they perform? If they’re drafty, outdated, or just don’t match your home’s vibe anymore, it might be time for a change.

    Replacement bow windows could be the upgrade you didn’t know you needed. They bring in more light, add style, and even give you a bit more space.

    Let’s break down what they are, how they work, and why they might be a great fit for your home.

    What Is a Replacement Bow Window?

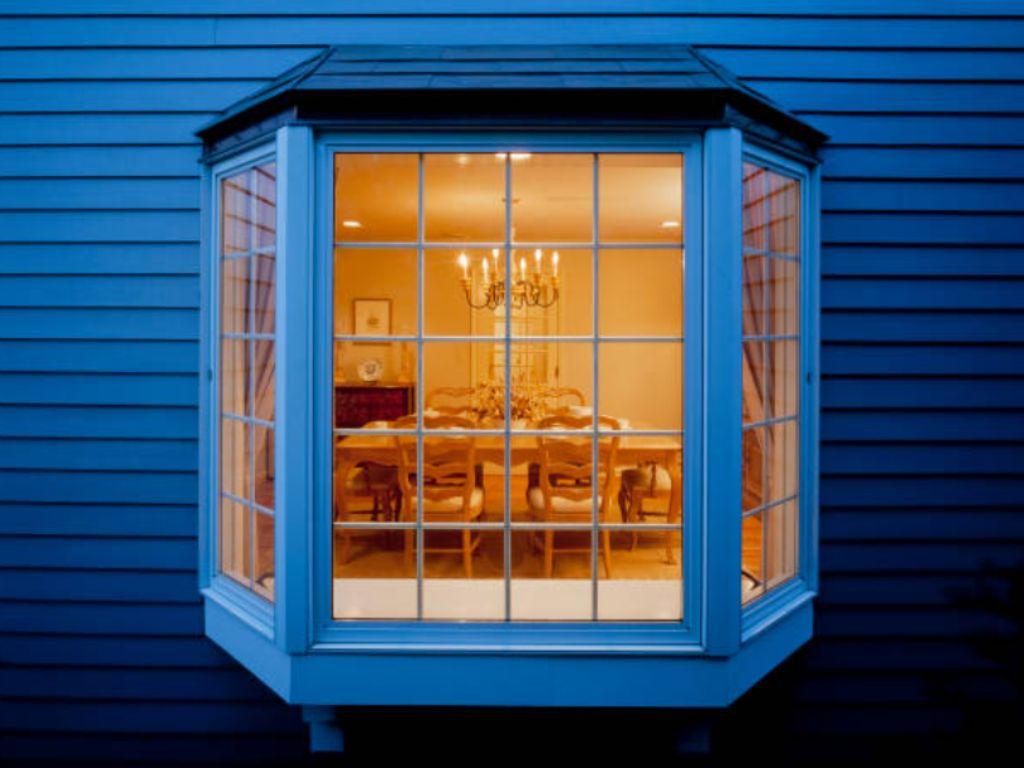
    A bow window is a curved, multi-panel window that extends outward from the wall of your home. Most include four to six equally sized window units arranged in a gentle arc.

    A replacement bow window is when you take out an old window—whether it’s a flat unit or an aging bow window—and install a new, upgraded version in its place.

    This upgrade is usually done to:

    • Improve energy efficiency
    • Boost natural light
    • Add character to your home
    • Expand the usable interior space

    Why Homeowners Choose Bow Windows

    If you’re replacing old windows, bow windows offer more than just a style upgrade. They can brighten up a space, add usable room, and even help with energy costs.

    Here are five practical benefits that make replacement bow windows a smart home improvement.

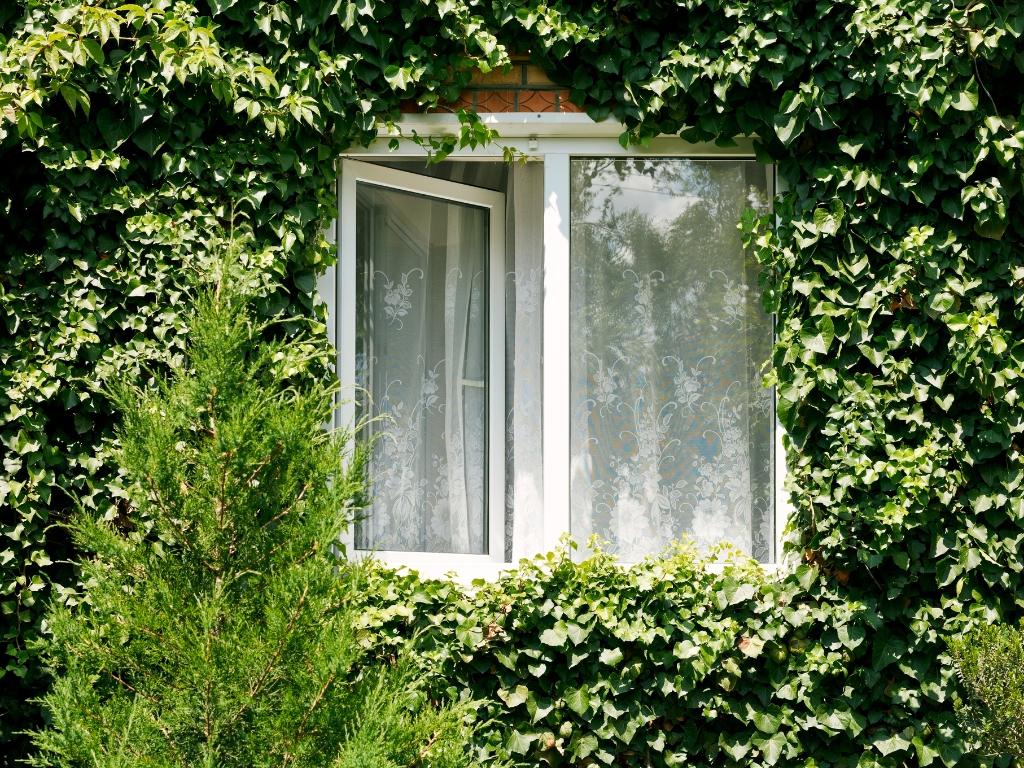
    1. They Let in More Light

    Because of their curved design, bow windows bring in light from several angles. This helps brighten up darker rooms that might only get light from one direction.

    You’ll likely find yourself turning on lights less during the day, which can make the whole space feel more open and welcoming.

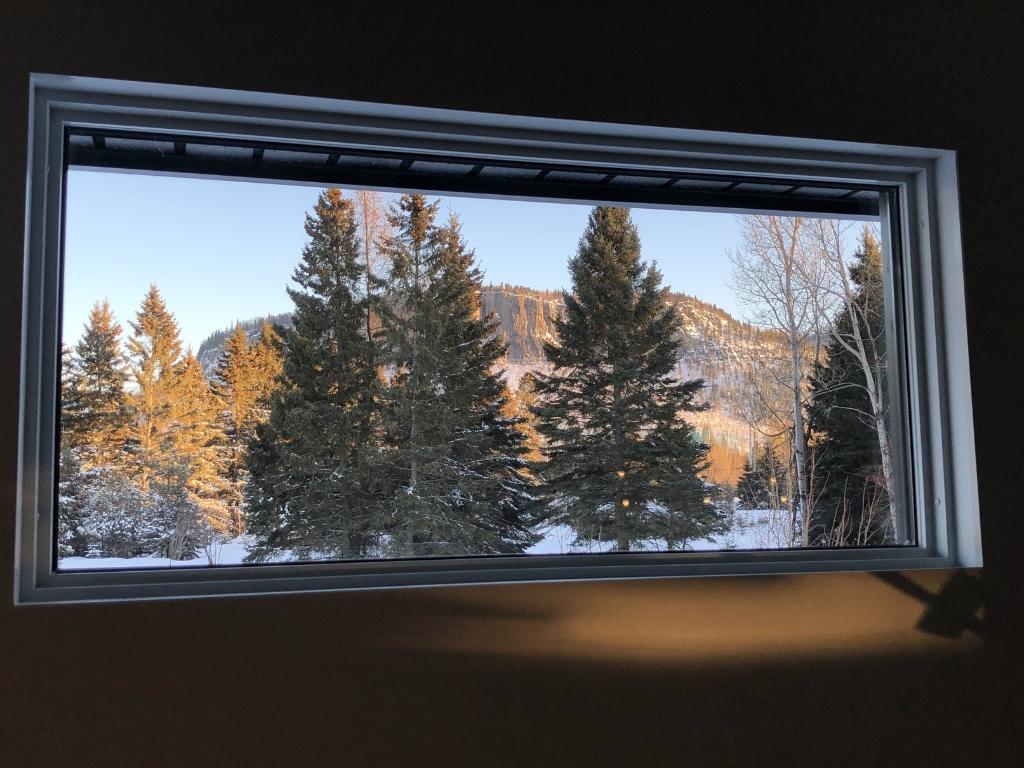
    2. They Provide a Wider View

    Bow windows give you a broader, more open view of the outdoors. You can see more of your yard, garden, or street compared to a standard flat window. 

    It’s also a nice way to keep an eye on your kids or pets while they’re outside without needing to step out.

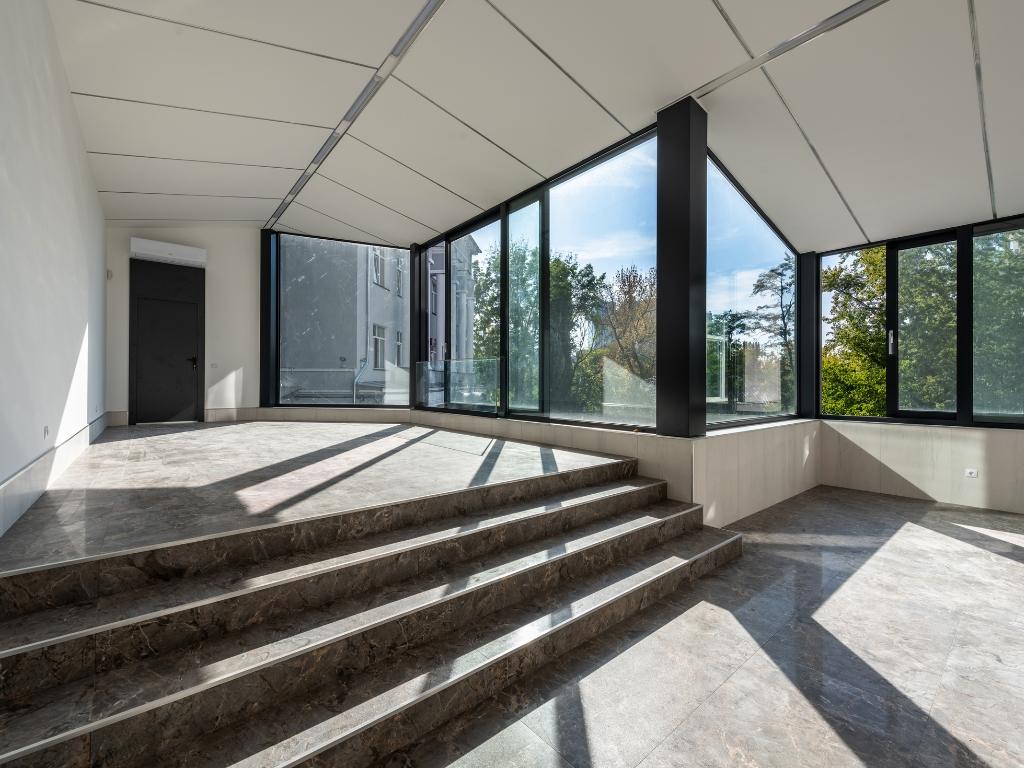
    3. They Add Extra Space

    Bow windows gently extend out from your home, which creates a little more interior space. That extra area is perfect for a window bench, plant display, or a small reading nook. It’s not a huge change, but it adds flexibility to how you use the room.

    4. They Improve Curb Appeal

    From the outside, bow windows add shape and dimension to flat exterior walls. They give your home a more finished, distinctive look—especially if the rest of the design feels plain. This kind of upgrade often makes a strong impression on potential buyers too.

    5. They Can Improve Energy Efficiency

    New bow windows are built with energy performance in mind. You’ll typically get double- or triple-pane glass, insulated frames, and coatings that help reflect heat.

    All of this works together to block drafts and keep temperatures stable, which can help reduce your energy bills over time.


    When Should You Replace a Bow Window?

    Wondering if it’s the right time? Check for the following signs that tell you it’s time to replace your bow windows:

    • Drafts or cold air near the window
    • Rotting or damaged frames
    • Foggy glass or moisture between panes
    • Difficulty opening or closing panels
    • Outdated or mismatched design

    If your current window has any of these issues, replacing it now can prevent further damage and higher energy bills.

    What’s the Difference Between Bow and Bay Windows?

    They’re often confused—but they’re not the same. Bow windows give a smoother curve and a broader view. Bay windows project more sharply and have a more angular design.

    Feature Bow Window Bay Window
    Shape Curved Angled
    Panels 4–6 equal-sized 3 panels (center + 2 sides)
    View Wider, continuous More segmented
    Style Softer appearance Sharper lines

    Choosing between them comes down to your space, your home’s style, and personal preference.

    Common Frame Materials for Replacement Bow Windows

    When you upgrade, you’ll choose the frame material too. Check out the pros and cons of each type below.

    Vinyl

    • Affordable and low-maintenance
    • Good insulation
    • Available in various colors
    • Less custom-looking

    Fiberglass

    • Strong and weather-resistant
    • Energy-efficient
    • Can mimic wood
    • Higher cost

    Wood

    • Warm, traditional look
    • Paintable and stainable
    • High maintenance
    • Vulnerable to moisture

    Composite

    • Made from a mix of wood fibers and polymers
    • Resistant to rot and warping
    • Good energy performance
    • Mid- to high-range cost

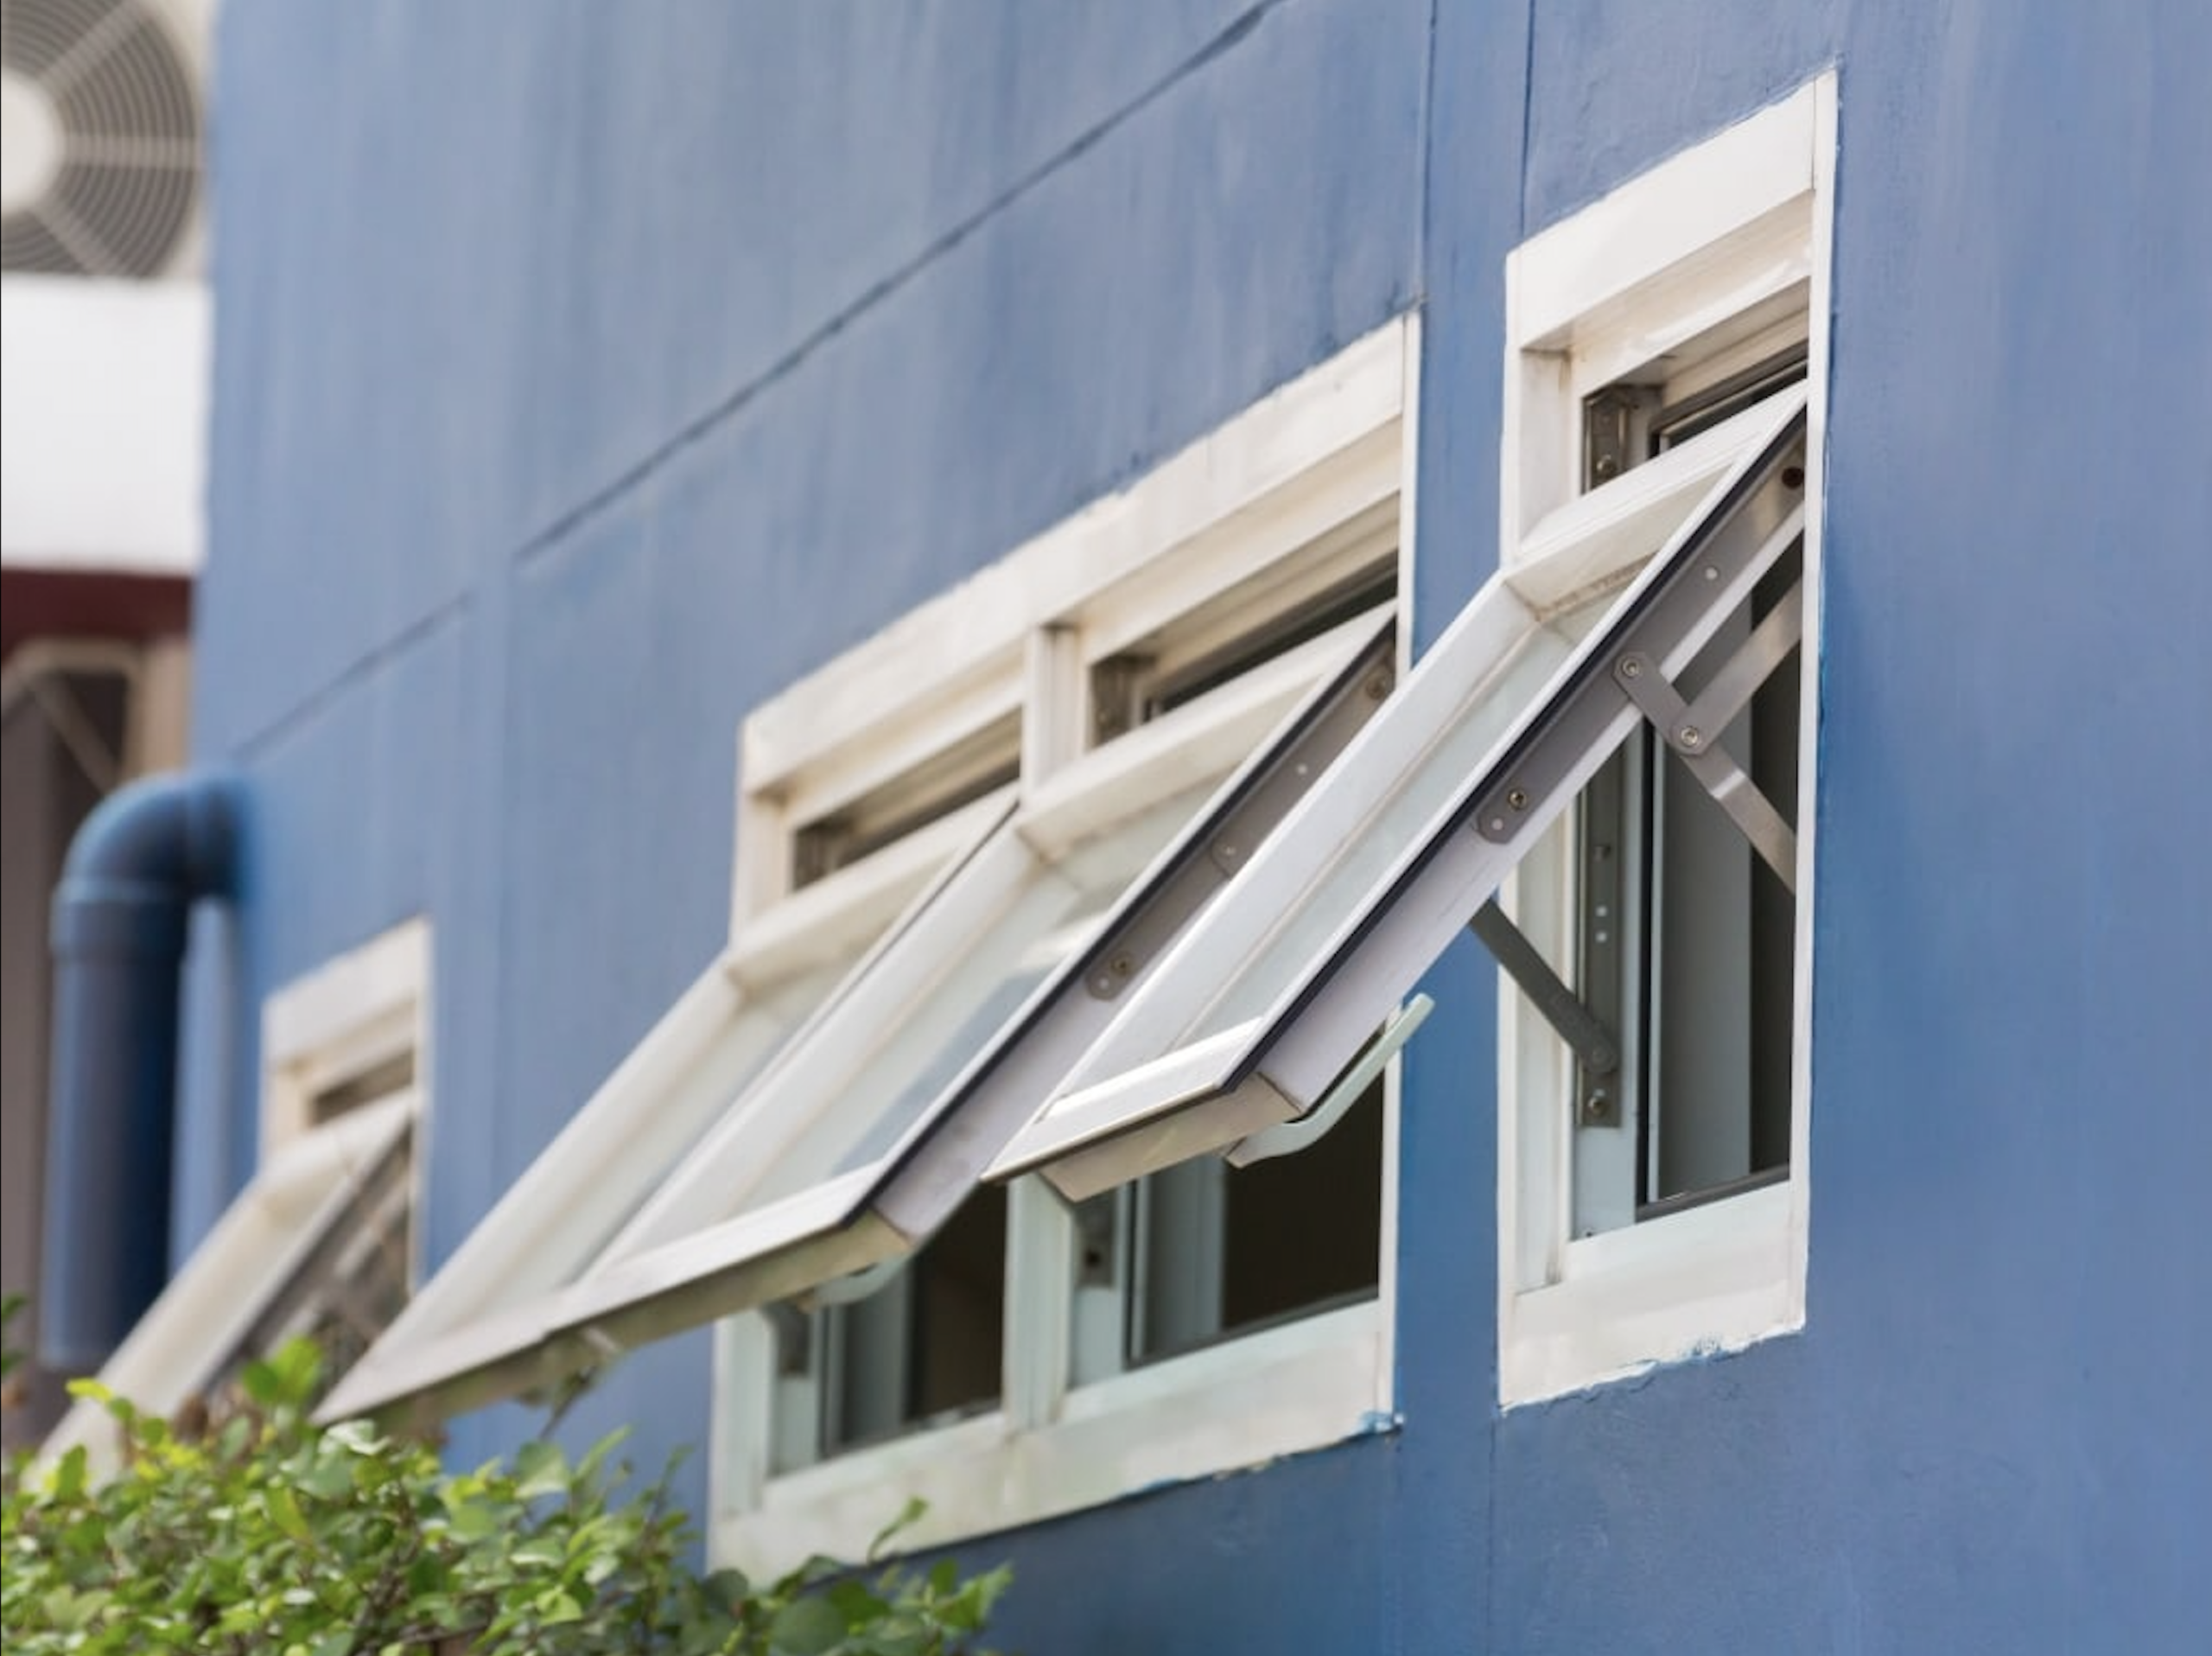
    Functional Options: Fixed vs. Operable Panels

    Most bow windows include a mix of fixed and operable window units. Your mix will depend on what room it’s in and how much airflow you want.

    Fixed

    • Do not open
    • More energy-efficient
    • Offers clean views

    Casement

    • Hinged on the side, open outward
    • Great for ventilation
    • Easy to clean

    Double-Hung

    • Both sashes slide vertically
    • Easy to control airflow
    • Suitable for classic home styles

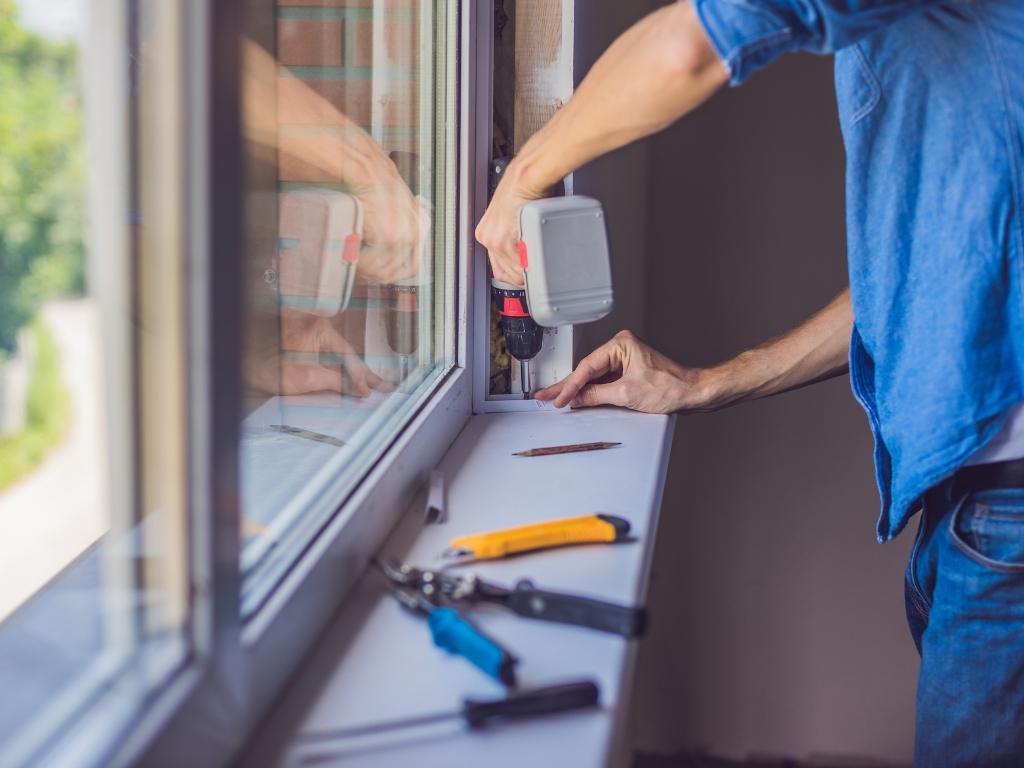
    What About Installation?

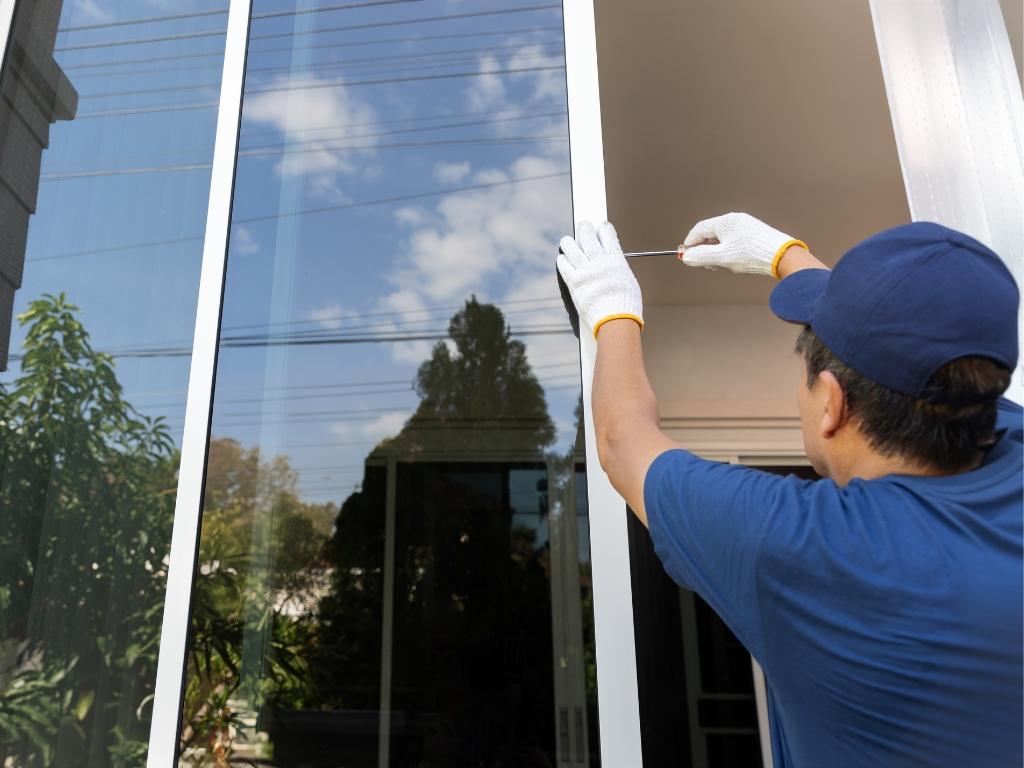
    Installing a replacement bow window is not like swapping in a standard window. It’s more complex.

    It requires:

    • Cutting into your home’s wall
    • Ensuring structural support
    • Managing weight and projection
    • Weatherproofing all edges

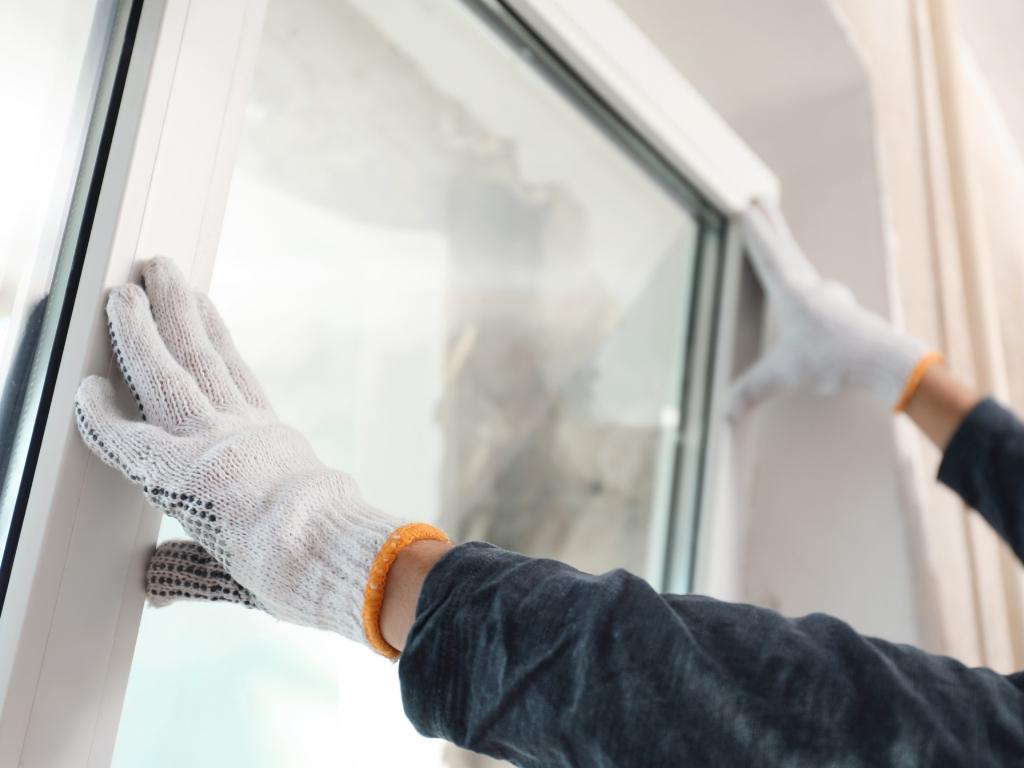
    This is not a DIY job. Hire a licensed professional to:

    • Assess your home’s structure
    • Match the new window to your siding and interior
    • Ensure a tight, energy-efficient seal
    • Avoid long-term issues like sagging or leaks

    A bad install can cost you more over time than doing it right the first time.

    How Much Do Replacement Bow Windows Cost?

    The cost varies depending on:

    • Window size and panel count
    • Frame and glass materials
    • Customization and hardware
    • Installation complexity

    Average cost: $3,500 to $10,000+ including professional installation.

    Yes, it’s a significant investment—but it’s also one that:

    • Reduces your energy bills
    • Increases home value
    • Adds daily comfort and enjoyment

    Before committing, ask for a detailed estimate and compare energy efficiency ratings.

    Is a Bow Window Right for Your Home?

    It depends on your space and goals.

    Bow windows are ideal if you:

    • Want more light and space in a key room
    • Have a flat window area that needs upgrading
    • Live in a home with traditional or transitional style
    • Can accommodate the outward projection

    But they may not be suitable if:

    • There’s limited exterior space
    • Your wall can’t support the added weight
    • You’re on a tight budget

    A professional installer can check these factors and suggest options that fit your home. Avoid costly mistakes—trust Ameritech Windows for professional, reliable installation that’s done right the first time. Contact us today for a free consultation.

    Get More from Your Home with a Better Window

    Bow windows aren’t just decorative. They change how your home works:

    • More daylight
    • Wider views
    • Additional room
    • Lower energy waste

    If you’re thinking about upgrading a window, replacing it with a bow design can deliver noticeable daily benefits.

    Talk to Ameritech Windows Today

    Ameritech Windows help homeowners choose and install the right replacement bow windows for long-term comfort, beauty, and efficiency. 

    Our experienced team can guide you through every step—from design to installation. Contact us for a free consultation and estimate.


    GET FREE QUOTE!

    Promo Ending Soon 05-01-2026

    SPRING SAVINGS Event
    Limited Time Only

    Colorado’s Premier Window & Door Specialists
    $395 OFF EACH WINDOW
    $795 OFF EACH DOOR
    $0 DOWN • 24 MONTHS NO INTEREST

    *With approved credit. See representative for details.

    Four-window minimum • New customers only
    Locally owned and operated in Colorado for over 30+ years

    Refresh Your Home for Spring — Lock In Your Savings Today

    Minimum purchase does apply and cannot be combined with any other discounts.*

    Deal is for first time customers only.**


    By submitting this form, I verify that the number provided is my mobile telephone number and I provide my express written consent for Ameritech Windows to contact me at this number via phone, email, and text message (SMS) using automated dialing technology for marketing purposes. I agree to the
    Terms and Conditions and
    Privacy Policy.
    Consent is not a condition of purchase. Message and data rates may apply. To opt out at any time, you may reply STOP to any text message or notify Ameritech Windows by telephone.

  • Replacement Bay Windows: Everything You Need to Know Before You Buy

    Replacement Bay Windows: Everything You Need to Know Before You Buy

    Bay windows bring in extra sunlight, give you a cozy spot to sit in, and add a nice touch to your home’s design. But if yours feel drafty, look outdated, or just aren’t working like they used to, it might be time to replace them.

    Here’s a quick breakdown of what to know before buying replacement bay windows—so you can make a smart choice that fits your home and budget.

    What Is A Replacement Bay Window?

    A replacement bay window is a pre-assembled unit that fits into your existing opening, replacing the old window without changing your wall structure. Most bay windows include:

    • A large fixed center window
    • Two smaller operable or fixed windows angled on each side
    • A frame that extends outward, creating a small ledge or seating nook

    The side windows can be casement, double-hung, or fixed. Bay windows are often found in living rooms, dining areas, or master bedrooms.

    They’re different from new-construction windows, which are installed when the wall is built or rebuilt. Replacement windows are designed to preserve your current wall, trim, and framing—saving time and cost.

    When Should You Replace A Bay Window?

    Some homeowners wait until a window fails completely before considering replacement. But delaying repairs can lead to more expensive damage. Watch for these signs:

    • Drafts or cold air – Even with closed windows, you feel temperature changes
    • Foggy or cloudy glass – This usually means the seal between panes is broken
    • Warped or rotting frames – Wood frames that are soft or discolored can signal water damage
    • Difficulty opening or locking the window – Warping or poor balance can cause this
    • Visible gaps or water leaks – These can affect your walls and flooring if left alone

    Even if your window still works, age matters. Most bay windows last 15–30 years depending on materials and exposure. If yours is near the end of that range, a replacement may be the smarter long-term choice.

    Benefits of Replacing Your Bay Window

    Upgrading your bay window does more than fix existing issues. It improves energy efficiency, comfort, and aesthetics. Here’s what you gain:

    • Energy savings – Modern windows reduce drafts and lower heating/cooling bills
    • More usable space – Deeper window seats or storage beneath the sill can be added
    • Improved curb appeal – Fresh materials and cleaner lines can update your home’s appearance
    • Noise reduction – Thicker glass and tighter seals help block outdoor sounds
    • UV protection – New windows can block harmful sunlight that fades flooring and furniture

    These benefits aren’t just cosmetic—they can help improve resale value and reduce maintenance.

    What To Look For

    Choosing a replacement window isn’t just about size and shape. You’ll want to evaluate materials, performance features, and layout options.

    Frame Material

    The frame is what holds the glass together. Here’s how common choices compare:

    • Vinyl – Affordable, good insulator, and virtually maintenance-free
    • Wood – Classic look but needs painting and sealing over time
    • Fiberglass – Stronger than vinyl, doesn’t warp, and resists weather damage
    • Composite – Made from multiple materials for strength and insulation

    Your choice will affect cost, durability, and appearance. Vinyl is the most budget-friendly, while fiberglass and composite offer better performance over time.

    Glass Options

    The glass you choose affects energy performance and comfort. Ask your contractor about:

    • Double-pane vs. triple-pane glass – Triple-pane costs more but adds insulation and soundproofing
    • Low-E coatings – Reflect heat while allowing visible light in
    • Gas-filled panes – Argon or krypton gas between panes improves thermal performance

    If your window gets a lot of sun, these upgrades can make a big difference in how your home feels year-round.

    Window Configuration

    You don’t have to match your old window exactly. Ask yourself:

    • Do you want side windows that open for airflow?
    • Would larger side windows enhance your view?
    • Do you need extra seating or shelving below the bay?

    Customizing your window can improve both function and style—without changing the size of the opening.

    How to Measure Bay Windows for Replacement

    Accurate measurements help avoid costly mistakes. Here’s a quick guide:

    • Width: Measure inside the frame from side to side at the top, middle, and bottom. Use the smallest number.
    • Height: Measure from the top of the frame to the sill on the left, center, and right. Use the shortest measurement.
    • Depth: Measure how far the window projects from the wall (inside trim to outside trim).
    • Angle: Most bay windows have 30°, 45°, or 90° angles between sections.

    Use a steel tape measure and avoid rounding. For best results, have a pro confirm before ordering.

    How Much Do They Cost?

    Pricing depends on the size, materials, brand, and installation complexity. On average:

    • Vinyl bay windows range from $2,000 to $3,500
    • Mid-range options with upgraded glass and frames cost $4,000 to $6,000
    • High-end custom windows (wood or composite) can exceed $6,500

    Labor usually adds $500–$1,000, depending on how much structural work is required. If the wall, sill, or exterior cladding needs adjustment, your total cost will increase.

    To stay within budget, get multiple quotes and ask for a breakdown of materials, labor, and disposal fees.

    What’s Involved In The Installation Process?

    Many homeowners don’t realize how detailed bay window installation can be. Here’s what the process includes:

    1. Inspection – A contractor checks the current window, measurements, and framing
    2. Custom ordering – The replacement window is built to fit your opening
    3. Old window removal – The existing bay is taken out carefully, preserving the opening
    4. Prep and repair – Any damage to framing, insulation, or flashing is repaired
    5. New window install – The unit is secured, leveled, and sealed
    6. Interior and exterior finish – Trim is reinstalled or replaced, and joints are caulked

    Most installs take one full day, but homes with water damage or custom siding may take longer.

    Installers often bring their own tarps and protective gear, but it’s still a good idea to move furniture and valuables away from the work area.

    Should You Replace or Repair?

    Not every issue calls for a full replacement. Here’s a quick guide:

    Repair if:

    • The problem is cosmetic (scratches, dings)
    • The sealant or caulking is failing
    • A single pane is cracked, but the frame is intact

    Replace if:

    • The frame is damaged or rotting
    • The glass is foggy or leaking
    • The window no longer opens, closes, or locks properly
    • Your energy bills are rising due to poor insulation

    You should also consider replacement if you’re planning to stay in your home long-term. A new bay window may pay for itself in comfort, resale value, and lower utility costs.

    Questions to Ask Before You Buy

    Before committing to a replacement, ask your contractor these important questions:

    • Are your products ENERGY STAR certified?
    • Who will install the window—your team or a subcontractor?
    • Is your labor warranty separate from the manufacturer’s?
    • What’s the lead time from order to install?
    • Do you take care of permits, if required?

    You deserve clear answers. If a contractor hesitates or dodges, it may be time to look elsewhere.

    Why Homeowners Choose Ameritech Windows

    Ameritech Windows helps homeowners get the most from their replacement bay windows with trusted service, clear pricing, and professional installation.

    We make it easy to upgrade without the pressure. Want expert help choosing the right replacement bay window? Reach out today; let’s talk!


    GET FREE QUOTE!

    Promo Ending Soon 05-01-2026

    SPRING SAVINGS Event
    Limited Time Only

    Colorado’s Premier Window & Door Specialists
    $395 OFF EACH WINDOW
    $795 OFF EACH DOOR
    $0 DOWN • 24 MONTHS NO INTEREST

    *With approved credit. See representative for details.

    Four-window minimum • New customers only
    Locally owned and operated in Colorado for over 30+ years

    Refresh Your Home for Spring — Lock In Your Savings Today

    Minimum purchase does apply and cannot be combined with any other discounts.*

    Deal is for first time customers only.**


    By submitting this form, I verify that the number provided is my mobile telephone number and I provide my express written consent for Ameritech Windows to contact me at this number via phone, email, and text message (SMS) using automated dialing technology for marketing purposes. I agree to the
    Terms and Conditions and
    Privacy Policy.
    Consent is not a condition of purchase. Message and data rates may apply. To opt out at any time, you may reply STOP to any text message or notify Ameritech Windows by telephone.

  • Step-by-Step Guide to Installing Slider Windows Like a Pro

    Step-by-Step Guide to Installing Slider Windows Like a Pro

    Installing slider windows can enhance your home’s energy efficiency, ventilation, and overall appearance. Whether you’re replacing old windows or upgrading to a new style, proper installation is key to long-lasting performance.

    This guide will take you through each step, ensuring a secure and professional-quality installation.

    What Are Slider Windows?

    Slider windows are a type of window that opens horizontally by gliding along a track. Instead of lifting or swinging open like other window styles, they slide from side to side, making them easy to operate.

    Why Choose Slider Windows?

    Before getting into the installation process, let’s look at why slider windows are a popular choice among homeowners.

    Easy to Operate – They glide open horizontally, making them ideal for hard-to-reach areas.
    Great for Ventilation – Open one or both panels to improve airflow in your home.
    Low Maintenance – Fewer moving parts mean fewer chances of wear and tear.
    Unobstructed Views – Large glass panels provide a clean, open look.

    Now, let’s move on to the installation process.

    Tools and Materials You’ll Need

    Before you begin, make sure you have the right tools and materials for a smooth installation. Having everything prepared in advance will save time and prevent unnecessary delays.

    Tools:

    • Tape measure
    • Level
    • Utility knife
    • Caulking gun
    • Drill and screwdriver
    • Pry bar
    • Hammer

    Materials:

    • New slider windows
    • Insulation foam
    • Weatherstripping
    • Screws and nails
    • Shims
    • Exterior-grade sealant

    Once you have everything ready, you can begin the installation process.

    Step 1: Remove the Old Window

    Before installing the new slider window, you must remove the existing one. Doing this carefully will help prevent damage to the surrounding wall.

    1. Loosen the Trim – Use a pry bar to remove the interior and exterior trim without damaging the wall.
    2. Unscrew or Cut Fasteners – If the old window is screwed in, remove the screws. If it’s nailed, use a reciprocating saw to cut through the nails.
    3. Lift Out the Window Frame – Gently push the old window frame out of the opening. If it’s stuck, use a utility knife to cut through any remaining caulk or sealant.
    4. Clean the Opening – Remove old insulation, debris, and adhesive to create a clean surface for the new window.

    If you find rotted wood around the frame, repair it before installing the new window to prevent future issues.

    Step 2: Prepare the Window Opening

    A properly prepared opening ensures a secure and energy-efficient installation. Before inserting the new window, make sure the opening is the right size and properly sealed.

    1. Measure the Opening – Double-check the width and height to ensure the new slider window will fit.
    2. Level the Sill – Use a level to check if the sill is even. If needed, add shims for support.
    3. Apply Flashing Tape – To prevent water damage, apply flashing tape along the bottom and sides of the opening.

    Taking the time to prepare the opening will help prevent future leaks or air drafts.

    Step 3: Insert the New Slider Window

    Now that the opening is ready, you can position and secure the new window. This step ensures that your slider window fits properly and operates smoothly.

    1. Test Fit the Window – Before applying sealant, place the window in the opening to confirm it fits correctly.
    2. Apply Sealant – Run a bead of exterior-grade caulk along the back of the window’s flange to create a waterproof seal.
    3. Position the Window – Carefully insert the window into the opening, pressing it firmly against the caulk.
    4. Secure with Screws – Drive screws through the window’s pre-drilled holes into the surrounding frame. Make sure the window is level and square before fully tightening.
    5. Add Shims for Stability – Place shims behind the frame where needed to keep the window secure. Trim any excess shims that stick out.

    Step 4: Insulate and Seal the Window

    Proper insulation and sealing prevent drafts and water leaks, keeping your home energy-efficient and protected from the elements.

    1. Apply Insulation Foam – Fill any gaps between the window frame and the wall with low-expanding spray foam insulation. Avoid overfilling to prevent warping.
    2. Install Weatherstripping – Add weatherstripping along the edges of the window to improve insulation and block out drafts.
    3. Caulk Around the Frame – Apply a bead of exterior-grade sealant along the outside of the window to prevent water infiltration.

    Step 5: Reinstall Trim and Test the Window

    Once the window is secured and sealed, the final step is to reinstall the trim and check for smooth operation.

    1. Replace Interior and Exterior Trim – Secure the trim back into place with nails or screws. Use caulk to seal any gaps.
    2. Clean the Window Track – Remove any dust or debris from the track to ensure smooth sliding.
    3. Test the Slider Window – Open and close the window multiple times to check for smooth movement and a tight seal.

    If everything functions correctly, your slider window installation is complete!

    Why Proper Installation Matters

    A well-installed slider window ensures:

    ✔️ A secure fit that prevents air leaks and energy loss
    ✔️ Smooth operation without sticking or jamming
    ✔️ Long-term durability with proper insulation and sealing

    A poorly installed window can lead to drafts, moisture buildup, and high energy bills. If you’re unsure about any step, consider hiring a professional for expert installation.

    Common Mistakes to Avoid

    Even with the right tools, some homeowners make mistakes that lead to costly repairs. Avoid these common pitfalls:

    🚫 Skipping Measurements – Even small errors can result in an improper fit.
    🚫 Forgetting to Level the Window – A crooked window won’t slide properly.
    🚫 Using Too Much Insulation Foam – Overfilling gaps can cause the frame to warp.
    🚫 Neglecting Weatherproofing – Without proper sealing, air and moisture can get in.

    Taking your time and following the right steps will ensure a high-quality installation that lasts.

    Upgrade Your Home with Professionally Installed Slider Windows

    Installing slider windows can improve your home’s comfort, efficiency, and style. If you’re ready to upgrade but want expert installation, Ameritech Windows offers high-quality solutions and professional service. Contact us today for a free consultation!


    GET FREE QUOTE!

    Promo Ending Soon 05-01-2026

    SPRING SAVINGS Event
    Limited Time Only

    Colorado’s Premier Window & Door Specialists
    $395 OFF EACH WINDOW
    $795 OFF EACH DOOR
    $0 DOWN • 24 MONTHS NO INTEREST

    *With approved credit. See representative for details.

    Four-window minimum • New customers only
    Locally owned and operated in Colorado for over 30+ years

    Refresh Your Home for Spring — Lock In Your Savings Today

    Minimum purchase does apply and cannot be combined with any other discounts.*

    Deal is for first time customers only.**


    By submitting this form, I verify that the number provided is my mobile telephone number and I provide my express written consent for Ameritech Windows to contact me at this number via phone, email, and text message (SMS) using automated dialing technology for marketing purposes. I agree to the
    Terms and Conditions and
    Privacy Policy.
    Consent is not a condition of purchase. Message and data rates may apply. To opt out at any time, you may reply STOP to any text message or notify Ameritech Windows by telephone.

  • Are Replacement Slider Windows Worth It? Pros and Cons Explained

    Are Replacement Slider Windows Worth It? Pros and Cons Explained

    Choosing new windows for your home is a big decision. Windows affects everything from energy efficiency to curb appeal. Replacement slider windows are a popular option for homeowners looking for convenience and affordability. But are they the right choice for your home?

    This guide breaks down the pros and cons of replacement slider windows, helping you determine if they are worth the investment.

    What Are Replacement Slider Windows?

    Slider windows, also called gliding windows, operate on a horizontal track. Instead of opening outward like casement windows or tilting like double-hung windows, slider windows move side to side. This simple mechanism makes them easy to operate, especially in spaces where lifting a window is difficult.

    They are commonly found in modern homes, apartments, and even basements. But before you install replacement windows, it’s important to weigh their advantages and drawbacks.

    Pros of Replacement Slider Windows

    Replacement slider windows offer several advantages. Here’s why they might be a good choice for your home.

    1. Easy to Use

    One of the biggest benefits of slider windows is their effortless operation. They glide open with a gentle push, making them a great choice for people who struggle with heavy or hard-to-reach windows.

    Ideal placements include:

    • Over kitchen sinks
    • In living rooms or bedrooms for better airflow
    • Basement windows that require easy access to fresh air

    If you want a window style that doesn’t require much effort, replacement slider windows are a practical solution.

    2. Unobstructed Views and Natural Light

    Slider windows typically have large glass panels, providing a wide, unobstructed view of the outdoors. Unlike double-hung or casement windows, which may have dividers or frames in the middle, slider windows offer a clean, open look.

    This is especially useful for:

    • Homeowners who want to maximize natural light
    • Homes with scenic backyard or garden views
    • Rooms that feel dark or closed-in

    3. Increased Ventilation

    Proper airflow is essential for maintaining indoor air quality and preventing moisture buildup. Slider windows allow you to open either side of the window, creating better cross-ventilation.

    They are especially beneficial in:

    • Kitchens where cooking fumes need to escape
    • Bathrooms to reduce humidity and mold growth
    • Living areas where fresh air circulation improves comfort

    4. Low Maintenance

    Fewer moving parts mean replacement slider windows are less likely to break compared to other styles. They do not have pulleys, springs, or cranks that can wear out over time.

    Additionally, some models have removable panels, making them easy to clean inside and out. Unlike traditional double-hung windows, you won’t have to struggle with hard-to-reach areas when washing them.

    5. Energy Efficiency Options

    Modern replacement slider windows come with energy-efficient features, such as:

    • Double or triple-pane glass for better insulation
    • Low-E coatings reflect heat in summer and retain warmth in winter
    • Weatherstripping to reduce drafts and improve efficiency

    Upgrading to energy-efficient models can help lower utility bills and improve indoor comfort.

    Cons of Replacement Slider Windows

    Despite their benefits, slider windows have some downsides. Consider these potential drawbacks before making a decision.

    1. Track Maintenance Required

    Since slider windows move along a track, dirt, dust, and debris can accumulate over time. If not cleaned regularly, the window may become harder to slide.

    To maintain smooth operation:

    • Vacuum or wipe down the track regularly
    • Use a silicone-based lubricant to prevent sticking
    • Avoid letting dirt build up, especially in high-traffic areas

    2. Security Concerns

    While most replacement slider windows come with standard locks, they may not be as secure as casement or picture windows. Because they slide rather than lock into a frame, they can be more vulnerable to forced entry.

    To enhance security:

    • Invest in reinforced locking mechanisms
    • Install security bars or dowels to prevent forced opening
    • Choose impact-resistant glass for added protection

    3. Fewer Design Options

    Slider windows tend to have a simple, modern look. While this works for contemporary homes, it may not complement traditional or historic architecture as well as other window styles.

    Additionally, they do not tilt or open outward, limiting decorative customizations. If aesthetics are a priority, you may want to explore other window options that match your home’s character.

    4. Potential Seal Wear Over Time

    Because slider windows do not have a compression seal like casement windows, their weatherstripping can wear down with use. Over time, this may lead to:

    • Small air leaks
    • Reduced energy efficiency
    • More frequent maintenance or replacement of seals

    Choosing high-quality materials and properly sealing your windows during installation can help reduce these issues.

    Are Replacement Slider Windows Right for You?

    Choosing replacement slider windows depends on your needs and priorities. Here’s a quick recap to help you decide:

    Great for homeowners who want:

    • An easy-to-use window with smooth operation
    • Large, unobstructed views and more natural light
    • Better ventilation in key areas of the home
    • A low-maintenance and cost-effective window option

    Might not be the best choice if you need:

    • Highly decorative or customizable window styles
    • Maximum security without additional reinforcements
    • A window that seals tightly for extreme weather conditions

    If you value simplicity, affordability, and function, replacement slider windows could be a smart investment for your home.

    Would they be the right upgrade for you? Consider your home’s design, climate, and lifestyle before making a decision.

    How to Replace Slider Windows

    Replacing slider windows involves removing the old window, preparing the opening, and installing the new unit securely. Follow these steps for a smooth replacement:

    1. Remove the Old Window – Use a pry bar to detach the trim, unscrew or cut fasteners, and carefully lift out the old frame. Clean the opening of any debris or old insulation.
    2. Prepare the Opening – Measure the space to ensure a proper fit, level the sill, and apply flashing tape for weather protection.
    3. Insert the New Window – Test fit the window, apply exterior-grade caulk around the flange, and set the window into place.
    4. Secure and Insulate – Screw the window frame into the opening, add shims for stability, and fill gaps with insulation foam.
    5. Seal and Finish – Apply caulk around the frame, reinstall trim, and clean the track for smooth operation.

    For a long-lasting, energy-efficient installation, ensure the window is level and properly sealed.

    The Ameritech Advantage: What Sets Us Apart

    Ameritech Windows stands out by offering high-quality, energy-efficient windows designed for durability and performance. Here’s what sets them apart:

    • Premium Materials – Built with strong, weather-resistant frames and high-performance glass for better insulation.
    • Custom-Fit Installation – Tailored to your home’s exact measurements for a perfect seal and long-lasting performance.
    • Energy Efficiency – Features like Low-E glass, argon gas fills, and multiple panes help reduce energy costs.
    • Enhanced Security – Reinforced frames and advanced locking systems provide added protection.
    • Customer-Focused Service – Dedicated support, expert consultations, and professional installation ensure a seamless experience.

    Ameritech Windows prioritizes quality, efficiency, and homeowner satisfaction, making them a trusted choice for replacement slider windows and other window upgrades.

    Contact Ameritech Windows today for a free consultation and see the difference for yourself!


    GET FREE QUOTE!

    Promo Ending Soon 05-01-2026

    SPRING SAVINGS Event
    Limited Time Only

    Colorado’s Premier Window & Door Specialists
    $395 OFF EACH WINDOW
    $795 OFF EACH DOOR
    $0 DOWN • 24 MONTHS NO INTEREST

    *With approved credit. See representative for details.

    Four-window minimum • New customers only
    Locally owned and operated in Colorado for over 30+ years

    Refresh Your Home for Spring — Lock In Your Savings Today

    Minimum purchase does apply and cannot be combined with any other discounts.*

    Deal is for first time customers only.**


    By submitting this form, I verify that the number provided is my mobile telephone number and I provide my express written consent for Ameritech Windows to contact me at this number via phone, email, and text message (SMS) using automated dialing technology for marketing purposes. I agree to the
    Terms and Conditions and
    Privacy Policy.
    Consent is not a condition of purchase. Message and data rates may apply. To opt out at any time, you may reply STOP to any text message or notify Ameritech Windows by telephone.

  • What Is a Picture Window and How Can It Transform Your Living Space?

    What Is a Picture Window and How Can It Transform Your Living Space?

    A picture window is a large, fixed-pane window designed to showcase expansive views and invite abundant natural light into your home. It subtly enhances the ambiance of your living space by framing the outdoors like a work of art. A picture window can brighten a room and create a sense of openness without relying on mechanical operation. 

    Whether you want to showcase a backyard garden, rolling hills, or city skyline, this sleek, fixed-pane window offers uninterrupted views with zero obstructions. But is it the right choice for your home? 

    Let’s dive into the benefits, potential drawbacks, and best ways to use a picture window to enhance your living space.

    Key Takeaways

    • Picture windows are large, fixed-pane windows designed to provide expansive views and natural light.
    • They enhance energy efficiency by sealing tightly, reducing air leaks, and minimizing outdoor noise.
    • These windows work best in living rooms, dining areas, and spaces with scenic views but don’t open for ventilation.
    • Landscaping plays a big role in maximizing the visual impact of picture windows.
    • Common mistakes include poor placement, lack of insulation, and neglecting sun exposure, all of which can be avoided with expert planning.

    Definition: Picture Windows

    What is a picture window? Picture windows are a type of fixed window designed to show off big, beautiful views. Think of them as a giant frame for the outdoors. Unlike ordinary fixed windows that only let in light, picture windows focus on bringing nature’s scenery inside, filling your home with sunshine.

    Unlike standard fixed windows, picture windows often come in larger sizes and have slimmer frames. This design choice gives you a clearer, more dramatic view. If you dream of making your living space feel bigger and brighter, a picture window can make a stunning impact.

    Before you buy one, it’s wise to weigh the good and the bad. Check out the pros and cons below to see if a picture window fits your needs!

    Pros of Picture Windows

    Picture windows offer practical benefits that can enhance your home’s comfort and efficiency. Here are some key advantages:

    ✅ Unobstructed Views

    With no grids or moving parts, picture windows offer a clear, panoramic view of the outdoors.

    ✅ Increased Natural Light

    These windows maximize sunlight, making your space feel brighter, more inviting, and even more spacious.

    ✅ Superior Energy Efficiency

    Since they don’t open, picture windows provide an airtight seal, reducing drafts and improving insulation.

    ✅ Low Maintenance

    With no mechanical parts, picture windows are easier to clean and less prone to wear and tear.

    ✅ Boosts Curb Appeal

    A well-placed picture window enhances the exterior of your home, adding a modern, elegant touch.

    Cons of Picture Windows

    While picture windows have plenty of perks, they’re not perfect for every home. Before making a decision, consider these potential drawbacks:

    ❌ No Ventilation

    Since picture windows don’t open, they can’t provide fresh air. Pairing them with operable windows is a smart solution.

    ❌ Heat & Glare Issues

    Without the right glass coatings, large windows can let in too much heat or glare. Low-E glass helps mitigate this issue.

    ❌ Difficult to Clean from the Outside

    Depending on placement, exterior cleaning may require professional help or special equipment.

    Best Uses for Picture Windows

    Not every space is suited for a picture window, but in the right location, they can make a huge impact. Here are the best places to install them:

    • Living Rooms & Dining Areas: Place the window opposite a scenic view or in the center of a feature wall for maximum impact. Pair with side windows for airflow.
    • Hallways & Staircases: Install at the end of a hallway or above a landing to brighten the space. Use frosted or tinted glass for privacy if needed.
    • High Ceilings & Accent Walls: Position high on the wall to emphasize ceiling height or above a fireplace for a dramatic focal point. Combine with transom windows for extra light.

    How Landscaping Enhances Picture Windows

    A well-placed picture window is like a frame for nature, and landscaping plays a big role in the final effect. Thoughtful landscaping can:

    • Create seasonal beauty, ensuring your view changes with the time of year.
    • Offer privacy with strategic placement of trees, shrubs, or decorative fencing.
    • Enhance curb appeal by making your window a standout feature from both inside and outside.

    Common Mistakes & How to Avoid Them

    A picture window can be a stunning feature, but poor planning can lead to regrets. Watch out for these common mistakes and how to prevent them.

    ❌ Poor Placement

    A picture window facing a dull or cluttered view won’t have the same impact as one showcasing greenery or open skies. Work with a professional to position it for maximum effect.

    ❌ Neglecting Insulation

    Large glass panes can cause heat loss if not properly insulated. Opt for energy-efficient glass to keep your home comfortable year-round.

    ❌ Ignoring Sun Exposure

    Too much direct sunlight can cause fading on furniture and floors. Window treatments or UV-protective glass help prevent this issue.

    Is a Picture Window Right for Your Home?

    If you want to brighten your space, boost curb appeal, and enjoy stunning outdoor views, a picture window is a fantastic choice. Ameritech Windows offers high-quality, energy-efficient picture windows tailored to your home’s style. Contact us today to explore your options and bring your vision to life!


    GET FREE QUOTE!

    Promo Ending Soon 05-01-2026

    SPRING SAVINGS Event
    Limited Time Only

    Colorado’s Premier Window & Door Specialists
    $395 OFF EACH WINDOW
    $795 OFF EACH DOOR
    $0 DOWN • 24 MONTHS NO INTEREST

    *With approved credit. See representative for details.

    Four-window minimum • New customers only
    Locally owned and operated in Colorado for over 30+ years

    Refresh Your Home for Spring — Lock In Your Savings Today

    Minimum purchase does apply and cannot be combined with any other discounts.*

    Deal is for first time customers only.**


    By submitting this form, I verify that the number provided is my mobile telephone number and I provide my express written consent for Ameritech Windows to contact me at this number via phone, email, and text message (SMS) using automated dialing technology for marketing purposes. I agree to the
    Terms and Conditions and
    Privacy Policy.
    Consent is not a condition of purchase. Message and data rates may apply. To opt out at any time, you may reply STOP to any text message or notify Ameritech Windows by telephone.

  • What Is a Casement Window? Pros, Cons, and Best Uses Explained

    What Is a Casement Window? Pros, Cons, and Best Uses Explained

    If you’ve ever stood in front of a window display wondering which style is right for your Colorado home, you’re not alone. Between double-hungs, sliders, and picture windows, the options can feel overwhelming. But there’s one window type that consistently outperforms the rest in terms of energy efficiency, ventilation, and weather sealing: the casement window.

    Here’s everything you need to know about casement windows, from how they work to whether they’re the right fit for your home along the Front Range.

    What Is a Casement Window?

    A casement window is a single-sash window that is hinged on one side and swings outward like a door. You operate it with a crank handle, which lets you control exactly how far the window opens. Unlike double-hung windows that slide up and down, or slider windows that move horizontally, casement windows pivot outward on their hinges to create a fully open sash.

    This design has been used in homes for centuries, but modern casement windows are engineered with multi-point locking systems, weatherstripping, and insulated glass units that make them one of the highest-performing window styles available today.

    How Casement Windows Work

    A folding or rotating crank mechanism sits at the bottom of the window frame. When you turn the handle, a mechanical arm pushes the sash outward from the frame. Most modern casement windows use a single-arm operator that applies even pressure across the sash, preventing the racking and binding that older designs were prone to.

    When closed, the crank pulls the sash tight against the frame’s weatherstripping. The multi-point locking system engages at multiple points along the sash edge, compressing the seal uniformly. This compression is what gives casement windows their superior air infiltration ratings compared to sliding or hung window styles where the sashes must have clearance to move past each other.

    Pros of Casement Windows

    Best Energy Efficiency of Any Operable Window

    Because the sash presses directly into the weatherstripping when locked, casement windows create a tighter seal than any sliding or hung window. There’s no gap between two moving sashes for air to leak through. According to the U.S. Department of Energy, air leakage is one of the largest sources of energy loss in homes, and the compression seal on casement windows directly addresses this problem.

    In Colorado, where winter temperatures can swing 40 to 60 degrees in a single day, that airtight seal keeps heated air inside and cold drafts out. When paired with triple-pane glass, casement windows deliver some of the lowest U-factor ratings available for residential windows.

    Full Ventilation

    A double-hung window can only open about 50% of its total area because one sash always blocks the other. A casement window opens the entire sash, giving you 100% of the window opening for airflow. On Colorado summer evenings when temperatures drop 20 or 30 degrees after sunset, opening casement windows throughout your home creates effective cross-ventilation without running the air conditioner.

    Wind Capture

    When a casement window opens outward, the sash acts like a scoop that catches side breezes and directs them into your home. This is particularly useful on the Front Range, where afternoon winds are common from March through June. A casement window mounted perpendicular to the prevailing wind can channel significantly more airflow than a slider or hung window in the same position.

    Unobstructed Views

    With a single sash and no meeting rail dividing the glass, casement windows offer clean sightlines. This matters when your home faces the Flatirons, Pikes Peak, or the Continental Divide. You get the full view without a horizontal bar cutting through it.

    Security

    The multi-point locking mechanism on casement windows makes them significantly harder to force open from the outside compared to single-latch sliding or hung windows. The hook-shaped locks embed into the frame at multiple contact points, and there’s no exposed gap to pry from the exterior.

    Cons of Casement Windows

    Not Ideal Next to Walkways or Patios

    Because the sash swings outward, casement windows can block walkways, paths, or patio areas when open. If you have a narrow side yard or a window that faces a high-traffic outdoor area, the protruding sash can be an obstruction. In these situations, a slider window or double-hung is the better choice.

    Crank Mechanism Requires Maintenance

    The crank operator has moving parts that can wear over time. Occasional lubrication of the gears and hinges keeps the mechanism smooth. On lower-quality windows, crank failures are a common service issue after 10 to 15 years. High-quality windows with stainless steel or hardened operators last significantly longer without problems.

    Size Limitations

    Casement windows work best at small to medium sizes. Very large casement sashes become heavy and put strain on the hinge hardware and crank mechanism. For large openings, a combination of a fixed picture window flanked by casement sidelights is a better approach than a single oversized casement.

    Best Uses for Casement Windows in Colorado Homes

    Casement windows perform best in specific locations throughout your home:

    • Kitchen: Above sinks and countertops where a crank is easier to reach than lifting a sash. The outward swing doesn’t interfere with faucets or dish racks.
    • Bathrooms: The tight seal prevents moisture from seeping into the frame cavity, reducing mold risk. Open them fully after showers to vent humid air quickly.
    • Bedrooms: Casement windows in bedrooms allow maximum airflow on cool summer nights without compromising security, since the multi-point lock engages when fully closed.
    • Upper stories: On second and third floors, casement windows catch higher wind currents and pull air through the home via the stack effect.
    • Egress openings: Because the sash opens fully, casement windows easily meet IRC egress requirements for bedrooms, which mandate a minimum 5.7-square-foot clear opening.

    Casement Windows vs Other Window Styles

    Feature Casement Double-Hung Slider
    Air sealing Compression seal (best) Sash-to-sash gap Sash-to-sash gap
    Ventilation area 100% of opening ~50% of opening ~50% of opening
    Ease of cleaning Tilt-out sash from inside Tilt-in sashes Removable sash
    Wind capture Sash scoops breeze No wind capture No wind capture
    Walkway clearance Protrudes when open No protrusion No protrusion
    Security Multi-point lock Single latch Single latch
    Best room placement Kitchen, bath, upper floors Any room Wide openings, low profile

    What About French Casement Windows?

    A French casement is a variation that uses two sashes hinged on opposite sides, with no center post (mullion) between them. When both sashes open, you get one wide, unobstructed opening. They’re ideal for locations where you want to maximize both the view and the ventilation, such as overlooking a backyard or mountain view.

    The tradeoff is cost and complexity. French casements require precise alignment of both sashes to maintain their seal, and the hardware is more involved than a single casement. They also require more wall space since both sashes swing outward.

    Frequently Asked Questions

    Are casement windows good for Colorado’s climate?

    Yes, they are an excellent choice. Their superior airtight seal is perfect for protecting against Denver’s cold winters and high winds, helping to lower energy bills. In the summer, their ability to open fully and catch breezes provides fantastic natural ventilation. Paired with triple-pane glass and Low-E coatings, casement windows handle Colorado’s extreme temperature swings and high-altitude UV exposure better than most other operable window styles.

    Can you put screens on casement windows?

    Absolutely. Because casement windows swing outward, the screens are placed on the inside of the window. This not only makes them easy to remove for cleaning but also protects them from the outdoor elements, extending their lifespan. Interior screens are less exposed to Colorado’s hail, UV, and wind compared to exterior screens on sliding or hung windows.

    What’s the difference between a French casement and a double-hung window?

    A French casement window has two sashes that open out from the center, creating one large, unobstructed opening. A double-hung window also has two sashes, but they slide vertically past each other and always have a horizontal bar (the meeting rail) in the middle of your view. The two designs serve different purposes: French casements maximize opening width and views, while double-hungs offer versatility and a traditional look.

    How long do casement windows last?

    High-quality casement windows with solid frames and durable hardware can last 30 to 40 years or more. The most common maintenance item is the crank operator, which should be lubricated periodically. Frame material matters significantly here. Hybrid vinyl-composite frames resist warping and maintain their structural integrity far longer than hollow vinyl frames, which can degrade and lose seal compression over time.

    Do casement windows increase home value?

    Window replacements consistently rank among the highest-ROI home improvement projects. According to National Association of Realtors research, homeowners recover a significant portion of their window replacement investment at resale. Casement windows specifically add value through their energy efficiency ratings, which are increasingly important to Colorado buyers focused on utility costs and sustainability.


    With their combination of airtight sealing, full ventilation, and clean sightlines, casement windows are one of the strongest choices for Colorado homeowners looking to upgrade their replacement windows. If you’re ready to see how casement windows could work in your home, contact Ameritech Windows for a free quote. We’ve been serving the Denver metro and Colorado Front Range since 1994.


    GET FREE QUOTE!

    Promo Ending Soon 05-01-2026

    SPRING SAVINGS Event
    Limited Time Only

    Colorado’s Premier Window & Door Specialists
    $395 OFF EACH WINDOW
    $795 OFF EACH DOOR
    $0 DOWN • 24 MONTHS NO INTEREST

    *With approved credit. See representative for details.

    Four-window minimum • New customers only
    Locally owned and operated in Colorado for over 30+ years

    Refresh Your Home for Spring — Lock In Your Savings Today

    Minimum purchase does apply and cannot be combined with any other discounts.*

    Deal is for first time customers only.**


    By submitting this form, I verify that the number provided is my mobile telephone number and I provide my express written consent for Ameritech Windows to contact me at this number via phone, email, and text message (SMS) using automated dialing technology for marketing purposes. I agree to the
    Terms and Conditions and
    Privacy Policy.
    Consent is not a condition of purchase. Message and data rates may apply. To opt out at any time, you may reply STOP to any text message or notify Ameritech Windows by telephone.

  • Top Signs It’s Time for Replacing Awning Windows

    Top Signs It’s Time for Replacing Awning Windows

    Have you ever wondered if your awning windows are still doing their job? Over time, even the best windows start to show their age, and knowing when to replace them can make a big difference in your home’s comfort, energy efficiency, and appearance. 

    In this blog, we’ll explore the top signs that it’s time for replacing awning windows, so you can keep your home looking great and running smoothly. Whether it’s drafts, difficult operation, or rising energy bills, we’ve got you covered!

    What Are Awning Windows?

    Awning windows are hinged at the top and open outward, creating a small “awning” effect that protects against rain while allowing airflow. They are often used in bathrooms, kitchens, or basements due to their space-saving design and ability to provide natural light and ventilation. Their unique design makes them functional and stylish, but over time, wear and tear can affect their performance.

    Top Signs It’s Time for Replacing Awning Windows

    Over time, awning windows can show signs of wear that affect their performance and appearance. Recognizing these signs early can help you decide whether a quick repair will do the trick or if a full replacement is necessary. 

    1. Difficulty in Opening or Closing

    Awning windows are designed to open and close effortlessly, but over time, you may notice that they’ve become stiff or difficult to operate. This issue often stems from rusted hinges, warped frames, or debris lodged in the mechanism. 

    While cleaning, lubricating, or tightening the hardware might temporarily restore functionality, these fixes won’t address the root cause if the frame is compromised. 

    If you find yourself struggling every time you open or close your windows, it may be time to replace them for smooth, hassle-free operation.

    2. Drafts or Air Leaks

    One of the most obvious signs that your awning windows are no longer performing well is the presence of drafts or noticeable air leaks. These leaks usually result from worn-out weatherstripping, broken seals, or gaps caused by frame warping. 

    While replacing weatherstripping or applying caulking can help in the short term, these solutions often fail to fully eliminate drafts if the frame is damaged. 

    Replacing your windows ensures a snug, airtight fit that prevents energy loss and keeps your home comfortable year-round.

    3. Condensation Between Glass Panes

    If you notice condensation or fogging between the panes of your double or triple-pane awning windows, it’s a clear sign that the seal has failed. This issue not only compromises the window’s insulating properties but also obstructs your view and diminishes the overall look of your windows. 

    While replacing just the glass might resolve the issue temporarily, it’s often a better investment to replace the entire window. Newer models come with improved sealing technology, ensuring long-lasting clarity and insulation.

    4. Visible Damage or Rot

    Awning windows are constantly exposed to the elements, and over time, their frames can suffer from cracking, warping, or even rot, especially if they’re made of wood. 

    These visible signs of damage not only reduce the structural integrity of the window but also make your home more vulnerable to drafts, pests, and water infiltration. 

    Minor cracks can sometimes be patched, but extensive rot or damage usually means the window has reached the end of its lifespan. Replacing the window ensures your home remains secure and well-insulated.

    5. Increased Noise from Outside

    Your windows play a crucial role in reducing noise from the outside, helping to maintain a peaceful environment inside your home. 

    If you’ve noticed an increase in external noise, it could mean that your awning windows are losing their soundproofing capabilities due to age or damage. 

    While adding weatherstripping or soundproofing materials can help reduce noise slightly, replacing your windows with modern, sound-insulating models is the best way to restore your home’s tranquility.

    6. Rising Energy Bills

    Older or damaged windows are often a major culprit behind rising energy costs. If your awning windows no longer provide proper insulation, they can allow heat to escape in the winter and cool air to leak out in the summer, forcing your HVAC system to work overtime. 

    While temporary fixes like applying window film or adding caulking might offer some relief, replacing your windows with energy-efficient models can significantly reduce your energy bills and improve your home’s overall comfort.

    7. Outdated Appearance

    Even if your awning windows are still functional, an outdated design can detract from your home’s curb appeal. Faded colors, old hardware, or designs that no longer match your home’s aesthetic can make your windows look tired and worn. 

    While painting the frames or updating hardware can give your windows a small facelift, replacing them with modern, stylish designs can dramatically enhance your home’s appearance and increase its market value.

    How Can Ameritech Windows Help?

    Ameritech Windows is your go-to expert for replacing awning windows. Here’s how we can help:

    • Free Consultation: We’ll evaluate your windows and provide personalized recommendations.
    • High-Quality Replacements: Choose from durable, energy-efficient awning windows that enhance your home.
    • Professional Installation: Our skilled team ensures a seamless and precise installation.
    • Exceptional Customer Service: We’re committed to making the entire process stress-free and enjoyable.

    Let Ameritech Windows help you upgrade your home today—contact us to schedule your consultation!

    Final Thoughts

    Replacing awning windows improves your home’s comfort, efficiency, and appearance. If you’ve noticed any of the signs we’ve covered, it’s time to consider an upgrade. Ameritech Windows offers expert guidance, top-quality replacements, and professional installation. Contact us today for your free consultation!


    GET FREE QUOTE!

    Promo Ending Soon 05-01-2026

    SPRING SAVINGS Event
    Limited Time Only

    Colorado’s Premier Window & Door Specialists
    $395 OFF EACH WINDOW
    $795 OFF EACH DOOR
    $0 DOWN • 24 MONTHS NO INTEREST

    *With approved credit. See representative for details.

    Four-window minimum • New customers only
    Locally owned and operated in Colorado for over 30+ years

    Refresh Your Home for Spring — Lock In Your Savings Today

    Minimum purchase does apply and cannot be combined with any other discounts.*

    Deal is for first time customers only.**


    By submitting this form, I verify that the number provided is my mobile telephone number and I provide my express written consent for Ameritech Windows to contact me at this number via phone, email, and text message (SMS) using automated dialing technology for marketing purposes. I agree to the
    Terms and Conditions and
    Privacy Policy.
    Consent is not a condition of purchase. Message and data rates may apply. To opt out at any time, you may reply STOP to any text message or notify Ameritech Windows by telephone.

  • How to Install Windows: A Complete Beginner’s Guide

    How to Install Windows: A Complete Beginner’s Guide

    Replacing windows might seem like a big project, but with a little guidance, it’s totally doable—even if you’re a beginner! Installing new windows can transform your home’s look, boost energy efficiency, and keep your space more comfortable year-round. 

    In this easy-to-follow guide, we’ll show you exactly how to install windows step by step. Ready to roll up your sleeves? Let’s get started!

    Why Proper Window Installation Matters

    Correct window installation impacts both the performance and lifespan of your windows. Here’s why it matters:

    • Energy Efficiency: Properly installed windows prevent air leaks, reducing energy bills.
    • Home Security: Securely fitted windows enhance your home’s safety.
    • Weather Protection: Well-sealed windows keep out rain, wind, and debris.
    • Aesthetics: Proper alignment ensures your windows look polished and professional.
    • Longevity: Correct installation minimizes wear and tear, extending window life.

    Ready to upgrade your home with perfectly installed windows? Follow our step-by-step guide or contact Ameritech Windows for expert help today!

    Tools and Materials You’ll Need

    Before starting, gather the following:

    • Measuring tape
    • Pry bar
    • Caulking gun and weatherproof sealant
    • Screwdriver and screws
    • Level
    • Utility knife
    • Shims
    • Insulation foam
    • Safety glasses and gloves

    How to Install Windows Step by Step

    Installing windows may seem like a challenging task, but by breaking it down into manageable steps, you’ll have your new windows in place in no time. Let’s dive into the details of each step.

    Step 1: Measure the Window Opening

    Accurate measurements are the foundation of a successful window installation. Using a measuring tape, measure the width of the window opening at three points: the top, middle, and bottom. 

    Repeat this process for the height, measuring the left, center, and right sides. Always use the smallest measurement to ensure a proper fit. Additionally, measure the depth to confirm that the new window will sit comfortably within the frame. 

    Taking precise measurements prevents unnecessary gaps and ensures your window operates smoothly once installed.

    Step 2: Remove the Old Window

    Before you can install the new window, you’ll need to remove the old one. Start by using a pry bar to carefully take off any trim or stops surrounding the window. If the old window is painted shut, use a utility knife to score through the paint along the edges. 

    Once the trim is removed, unscrew the old window sash and frame using a screwdriver. Be sure to wear safety glasses and gloves to protect yourself from broken glass or sharp edges. 

    Once the window is out, clean the opening thoroughly, removing any leftover debris, caulking, or nails to prepare for the new installation.

    Step 3: Prepare the Window Opening

    Before placing the new window, you’ll need to ensure the opening is level and square. Use a level to check the alignment of the top, bottom, and sides of the frame. 

    If you find any uneven areas, adjust them using shims. Shims are thin, wedge-shaped pieces of material used to fill gaps and create a stable, level surface. Insert the shims at key points, such as the bottom corners and along the sides, to achieve a snug fit. 

    A well-prepared opening is essential for ensuring that the window sits securely and operates properly.

    Step 4: Install the New Window Frame

    Once the opening is prepared, it’s time to place the new window frame. Carefully lift the frame into the opening and position it evenly. Use your level again to check for proper alignment. 

    If adjustments are needed, insert shims at the necessary points until the frame is perfectly square. Once aligned, secure the window by screwing the frame into place. 

    Start by fastening the screws at the top corners, then work your way to the bottom. Be careful not to overtighten the screws, as this can distort the frame and affect the window’s performance.

    Step 5: Seal and Insulate

    With the frame securely in place, the next step is to seal and insulate the window. Use a caulking gun to apply a bead of weatherproof sealant around the exterior edges of the frame. This creates a watertight barrier that prevents moisture from seeping in. 

    Next, use insulation foam to fill any gaps between the window frame and the opening. The foam expands to block drafts and improve energy efficiency. 

    Once the foam has set, apply another layer of sealant if needed and smooth it out with a damp finger or tool for a clean finish.

    Step 6: Reinstall Trim and Test the Window

    The final step is to reinstall the interior and exterior trim. Carefully align the trim pieces and secure them in place using screws or nails. This not only enhances the window’s appearance but also helps keep it secure. 

    Once the trim is reattached, test the window by opening and closing it several times. Ensure it operates smoothly and locks properly. 

    Finally, check for any air leaks by running your hand around the edges. If everything feels snug and secure, your installation is complete! Clean the glass and frame to remove dust or smudges, and enjoy your new windows.

    How Can Ameritech Windows Help?

    At Ameritech Windows, we make window installation easy and hassle-free. Here’s how we can help:

    • Professional Installation: Our experts ensure every window fits perfectly and operates smoothly.
    • High-Quality Products: Choose from a wide range of durable, energy-efficient, and stylish windows.
    • Personalized Advice: We’ll help you select the best windows to match your home and budget.
    • Energy Savings: Proper installation and premium windows reduce energy costs year-round.
    • Comprehensive Support: From consultation to post-installation, we’re with you every step of the way.

    Contact us today to schedule your consultation and enjoy expertly installed windows!

    Final Thoughts

    Installing windows may seem challenging, but with the right tools, clear instructions, and a bit of patience, it’s a rewarding DIY project that enhances your home’s comfort and value. 

    For homeowners who want professional results without the hassle, Ameritech Windows is here to help. Contact us today to schedule your consultation and enjoy beautiful, expertly installed windows!


    GET FREE QUOTE!

    Promo Ending Soon 05-01-2026

    SPRING SAVINGS Event
    Limited Time Only

    Colorado’s Premier Window & Door Specialists
    $395 OFF EACH WINDOW
    $795 OFF EACH DOOR
    $0 DOWN • 24 MONTHS NO INTEREST

    *With approved credit. See representative for details.

    Four-window minimum • New customers only
    Locally owned and operated in Colorado for over 30+ years

    Refresh Your Home for Spring — Lock In Your Savings Today

    Minimum purchase does apply and cannot be combined with any other discounts.*

    Deal is for first time customers only.**


    By submitting this form, I verify that the number provided is my mobile telephone number and I provide my express written consent for Ameritech Windows to contact me at this number via phone, email, and text message (SMS) using automated dialing technology for marketing purposes. I agree to the
    Terms and Conditions and
    Privacy Policy.
    Consent is not a condition of purchase. Message and data rates may apply. To opt out at any time, you may reply STOP to any text message or notify Ameritech Windows by telephone.

  • Is It Time for a Picture Window Replacement? Top Signs to Look For

    Is It Time for a Picture Window Replacement? Top Signs to Look For

    Picture windows are a hallmark of modern home design, offering expansive views, ample natural light, and a seamless connection between the indoors and outdoors. However, like all window types, they don’t last forever. 

    Over time, factors such as wear, outdated styles, and energy efficiency concerns may signal the need for a picture window replacement. Below, we’ll explore what picture windows are, when to replace them, and how to find the right replacement for your home.

    Key Takeaways

    • Picture windows are large, fixed windows that provide unobstructed views, abundant natural light, and improved energy efficiency for your home.
    • Signs like rising utility bills, condensation, visible damage, frequent maintenance, or outdated styles indicate it’s time to replace your picture window.
    • Choose the right materials, set a budget, explore energy-efficient styles, and work with a trusted installer for a successful replacement.

    What is a Picture Window?

    A picture window is a large, fixed window that doesn’t open. Its primary purpose is to provide unobstructed views, let in natural light, and enhance the beauty of your home. These windows are typically installed in spaces like living rooms, dining rooms, and other areas where ventilation is less critical, and aesthetics take center stage.

    Compared to operable windows like double hung windows or single hung windows, picture windows are known for their larger sizes and sleek designs. With their fixed sash and double pane glass options, picture windows also contribute to your home’s energy efficiency, reducing heat loss and air leakage.

    Top Signs That Your Window Needs Replacement

    While picture windows are durable, they are not immune to the effects of time and exposure to the elements. Here are some key signs that indicate it may be time for a picture window replacement:

    1. Increased Utility Bills

    Old windows often lack the modern energy-efficient technologies found in new models, such as Low-E coatings, multiple panes, and advanced insulation. Without these features, your home may lose heat in winter and gain excessive heat in summer, leading to skyrocketing utility bills.

    Why It Matters: Windows account for a significant portion of your home’s energy loss. Picture windows without proper insulation can act as weak points in your home’s thermal envelope, causing your HVAC system to work overtime to maintain a comfortable temperature.

    Solution: Replacing your picture window with an energy-efficient option can lower your energy bills and reduce your carbon footprint. New windows with double pane glass and Low-E coatings create a barrier against heat transfer, keeping your home comfortable year-round.

    2. Condensation or Fogging Between Panes

    Condensation between the panes of double pane glass is a clear sign of a failed seal. This failure allows insulating gas, such as argon or krypton, to escape and moisture to seep in, reducing your window’s efficiency and clarity.

    Why It Matters: Not only does fogging obscure your view, but it also signals reduced insulation performance. This can lead to drafts, higher energy costs, and potential damage to the surrounding frame due to trapped moisture.

    Solution: Replacing old picture windows with new, high-quality double pane models ensures a clear view and improved insulation. Consider vinyl picture windows for their durability and resistance to seal degradation.

    3. Visible Damage to the Frame or Glass

    Cracks in the glass or damage to the frame can result from weather exposure, accidental impacts, or natural wear over time. Common issues include warping in wood frames, chipping in vinyl, and cracking in stone finishes.

    Why It Matters: Damaged frames and glass not only compromise your home’s insulation but also pose safety risks. Cracks allow air leakage, reducing your home’s energy efficiency and making your interior more vulnerable to external elements like pests, moisture, and noise.

    Solution: Replacing the window ensures your home remains secure, energy-efficient, and visually appealing. Opt for materials like maintenance-free vinyl or reinforced glass for better durability.

    4. Frequent Maintenance Requirements

    If you’re constantly repainting, resealing, or repairing your window to keep it functional, it’s likely time for a replacement. Wood frames, while beautiful, often require frequent maintenance, whereas vinyl options are more durable and low-maintenance.

    Why It Matters: Repeated repairs can become costly and time-consuming, and they don’t always address underlying issues like inefficient insulation or structural wear.

    Solution: Switching to vinyl picture windows eliminates the need for frequent upkeep, offering a maintenance-free solution that still delivers on style and performance.

    5. Outdated Window Styles

    Window styles evolve over time, and old windows can make your home look dated. New picture windows are designed to enhance your home’s architectural style while improving performance and efficiency.

    Why It Matters: Outdated styles don’t just affect aesthetics—they can also indicate inefficiencies in design and insulation. Modern picture windows often come with custom options, decorative grids, and larger sizes that can enhance both the functionality and look of your home.

    Solution: Replacing your window with a modern design tailored to your home’s style can significantly increase curb appeal and even boost your property’s resale value.

    How to Find a Picture Window Replacement

    When replacing a picture window, consider several factors to ensure the best results for your house and budget.

    1. Assess Your Window Needs

    Start by evaluating the condition of your current picture window. Look for cracks, drafts, or fogging. Identify your desired size and energy efficiency preferences.

    2. Set Your Budget

    Determine how much you’re willing to spend. Include costs for materials, installation, and potential upgrades, like double-pane glass or custom framing.

    3. Research Window Styles and Features

    Explore various picture window styles. Consider energy-efficient options, UV protection, and the right framing material, such as wood, vinyl, or aluminum.

    4. Find a Trusted Window Company

    Look for local window replacement companies with excellent reviews. Check certifications, warranties, and customer testimonials to ensure reliability.

    5. Request Quotes and Compare

    Get multiple quotes from professional installers. Compare pricing, timelines, and included services to find the best value for your needs.

    6. Schedule Installation

    Once you’ve chosen a company, schedule the installation at a convenient time. Ensure the area around the window is clear for a smooth process.

    7. Inspect the Finished Work

    After installation, inspect the new window for proper sealing and alignment. Address any issues immediately with the installer.

    How Can Ameritech Windows Help?

    At Ameritech Windows, we specialize in high-quality window replacement solutions tailored to your needs. Our picture windows and other products combine beauty, durability, and efficiency to improve your home.

    Here’s why homeowners trust Ameritech Windows:

    • Energy Efficiency: Our windows feature Low-E coatings, double pane glass, and advanced insulation to minimize heat loss and maximize comfort.
    • Custom Options: Choose from a wide range of window types, grid options, and styles to create the perfect fit for your home.
    • Professional Installation: Proper installation ensures optimal performance and increased home value, and our experts deliver nothing less.
    • Durable Materials: From vinyl to wood, we use high-quality materials that withstand the elements and reduce maintenance needs.
    • Comprehensive Service: We guide you through the entire process, from selecting the right window styles to final installation.

    Whether you’re replacing old picture windows or upgrading to a more energy-efficient solution, Ameritech Windows is here to help.

    Wrapping Up

    A picture window replacement can revitalize your home, improve energy efficiency, and enhance your comfort and style. By recognizing the signs that it’s time to replace your window and partnering with a trusted company like Ameritech Windows, you can achieve a beautiful, functional upgrade that adds value to your home.

    Ready to enhance your home with a new picture window? Contact Ameritech Windows today for a free consultation and discover how we can transform your spaces with quality and care!


    GET FREE QUOTE!

    Promo Ending Soon 05-01-2026

    SPRING SAVINGS Event
    Limited Time Only

    Colorado’s Premier Window & Door Specialists
    $395 OFF EACH WINDOW
    $795 OFF EACH DOOR
    $0 DOWN • 24 MONTHS NO INTEREST

    *With approved credit. See representative for details.

    Four-window minimum • New customers only
    Locally owned and operated in Colorado for over 30+ years

    Refresh Your Home for Spring — Lock In Your Savings Today

    Minimum purchase does apply and cannot be combined with any other discounts.*

    Deal is for first time customers only.**


    By submitting this form, I verify that the number provided is my mobile telephone number and I provide my express written consent for Ameritech Windows to contact me at this number via phone, email, and text message (SMS) using automated dialing technology for marketing purposes. I agree to the
    Terms and Conditions and
    Privacy Policy.
    Consent is not a condition of purchase. Message and data rates may apply. To opt out at any time, you may reply STOP to any text message or notify Ameritech Windows by telephone.

  • Buying House Windows: How to Balance Aesthetics, Functionality, and Cost

    Buying House Windows: How to Balance Aesthetics, Functionality, and Cost

    Choosing new windows for your home is more than just picking a style you like—it’s about making a decision that impacts your daily comfort, energy savings, and even your home’s security. Whether you’re replacing old windows or selecting ones for a new construction project, the right choice can transform your home’s look and performance for years to come.

    This guide is here to help you navigate the process with confidence, providing tips to balance aesthetics, functionality, and cost. By the end, you’ll be equipped to buy windows that enhance your home’s curb appeal, maximize energy efficiency, and stay within your budget.

    Why Balancing Style, Function, and Cost Matters

    When buying house windows, achieving the right balance between style, functionality, and cost is essential. Overlooking any one of these aspects can lead to disappointment.

    By carefully balancing these factors, you can ensure your windows not only meet your needs today but also add long-term value to your home. Here are some key benefits of making the right choice:

    • Curb Appeal: Stylish windows enhance your home’s façade and architectural design. A sleek bay window or sliding glass doors, for instance, can completely transform your exterior.
    • Energy Efficiency: Energy efficient windows, like those with an Energy Star label, reduce heat transfer and help you save money on heating and cooling costs. Consider features like low-E coatings, argon gas fills, and triple pane glass to optimize energy savings.
    • Resale Value: Modern, well-maintained windows attract buyers. Replacing windows with energy-efficient options can also qualify for federal tax credits, increasing the appeal to future homeowners.

    Choosing the perfect windows is all about finding a solution that fits your needs, enhances your home’s performance, and stays within your budget. To make the process simpler, we’ve broken it down into clear steps below.

    Step 1: Assess Your Home’s Needs

    Before buying windows, it’s essential to evaluate your home’s unique requirements. Factors like climate, architectural style, and functional priorities will help you determine whether you need replacement windows or new construction windows. Here’s how to align your choices with your home’s needs:

    Consider Your Climate

    • Cold Regions: Opt for double pane windows or triple pane glass combined with insulated frames and low-E coatings to minimize heat loss and keep your home warm.
    • Hot Regions: Prioritize windows with a low solar heat gain coefficient (SHGC) to reduce unwanted solar heat while still letting in natural light.
    • Storm-Prone Areas: Choose windows with impact-resistant glass and reinforced frames to provide additional protection during severe weather.

    Prioritize Energy Efficiency

    Reducing energy bills begins with buying house windows that meet high energy efficiency standards. Features like argon gas fills and vinyl frames with thermal breaks significantly reduce heat transfer, keeping your home comfortable year-round. 

    Always consult the National Fenestration Rating Council (NFRC) ratings for U-factor and SHGC to ensure your windows deliver optimal performance.

    Address Noise Reduction

    For homes located near busy streets, highways, or other noisy environments, soundproofing is key. Laminated glass or double strength glass can effectively block outside noise, creating a quieter, more relaxing living space.

    Step 2: Choose Window Styles That Complement Your Home

    Selecting the right window types is about finding the perfect balance between style and function. Whether you’re upgrading with replacement windows or selecting for a new build, there’s a window style to match your needs.

    Double-Hung Windows

    Double-hung windows are a classic choice, perfect for traditional homes, bedrooms, and living rooms. Both sashes can be opened, offering excellent ventilation and making them easy to clean. Their timeless design complements almost any architectural style, making them a versatile and popular option.

    Single-Hung Windows

    Ideal for budget-conscious homeowners or smaller spaces, single-hung windows feature a fixed top sash with a movable bottom sash. They are energy efficient and simple, making them a practical choice for multi-family units or areas where minimal maintenance is a priority.

    Casement Windows

    Casement windows are hinged on one side and open outward with a crank, making them perfect for modern homes or kitchens. Their tight seal provides superior energy efficiency, while their design allows for unobstructed views and great ventilation, especially in hard-to-reach areas.

    Awning Windows

    Awning windows are hinged at the top and swing outward, making them an excellent choice for bathrooms, basements, or rooms in rainy climates. Their design allows ventilation without letting rain in, and they work well in tight spaces or paired with other window types for added functionality.

    Sliding Windows

    Sliding windows open horizontally with one or more panels gliding along a track, offering a sleek and simple design. Perfect for contemporary homes, they work well in living rooms, kitchens, or wide wall spaces where you want to maximize natural light and airflow.

    Bay Windows

    Bay windows protrude outward from the home, creating a statement feature that works beautifully in Victorian-style homes, living rooms, or dining areas. They provide extra interior space for seating or decor while flooding the room with light, adding both charm and function.

    Bow Windows

    Similar to bay windows but with a softer, curved shape, bow windows bring an elegant touch to classic or luxurious homes. They’re ideal for creating a cozy nook or brightening spaces like seating areas or sunrooms with a panoramic view.

    Garden Windows

    Designed to project outward, garden windows are often installed in kitchens to create a mini-greenhouse for plants, herbs, or decorative items. They bring in ample natural light and offer a unique way to combine practicality with charm.

    Glass Block Windows

    Glass block windows are known for their privacy and durability, making them a top choice for bathrooms and basements. They allow natural light to filter in while obscuring the view, and their solid construction makes them highly secure.

    Picture Windows

    Picture windows are large, fixed panes of glass that don’t open, designed to frame scenic views. They’re ideal for modern homes or living rooms, offering an uninterrupted connection to the outdoors while letting in abundant light.

    Arched or Specialty Windows

    Specialty windows, such as arched or circular designs, add a custom touch to homes with unique architecture or historic styles. These windows make a bold statement, offering character and elegance while enhancing your home’s overall aesthetic.

    Skylights

    Skylights are installed in ceilings, bringing in natural light from above to brighten bathrooms, attics, or smaller rooms. They make spaces feel larger and more open, often enhancing the energy efficiency of homes by reducing the need for artificial lighting.

    Step 3: Understand Key Functional Features

    A window’s performance depends on its construction and materials. Understanding these features ensures you buy windows that meet your expectations.

    Energy Efficiency Features

    Energy-efficient windows help lower energy bills and keep your home comfortable. Low-E coatings reduce heat gain and loss without blocking natural light. 

    Gas fills like argon or krypton provide insulation between panes, while spacer technology minimizes heat transfer around the glass edges for consistent performance.

    Frame Material Options

    Window frames affect both energy efficiency and style. Vinyl windows are durable, low-maintenance, and budget-friendly. Wood frames offer classic beauty but require upkeep unless paired with aluminum cladding. 

    Fiberglass is strong and energy efficient, ideal for harsh climates, while aluminum provides a modern look but needs thermal breaks for better performance.

    Security and Durability

    Windows with reinforced locks, laminated glass, and impact-resistant designs offer enhanced safety against break-ins and extreme weather. Smart technology adds convenience with remote locking and monitoring for added peace of mind.

    Step 4: Set a Realistic Budget

    Investing in windows requires planning for quality and durability to ensure long-term value. While cheaper options may seem appealing, they can lead to higher maintenance costs, energy loss, or early replacement.

    Basic vinyl windows cost $300-$600 per unit, while premium wood or fiberglass options range from $800-$1,200 per unit. Installation adds $150-$800 per window, depending on complexity. Professional installation is key to optimal performance and durability.

    Budget Tips

    • Ask about discounts for bulk purchases or seasonal sales.
    • Explore financing options to spread out the cost of installing windows.
    • Consider the long-term energy savings when evaluating costs.

    Expert Tips for Buying House Windows

    Small details can make a big difference in the performance and longevity of your windows. Here are some additional tips to ensure you make the best choice:

    • Request Samples: Compare frame color and material to match your home’s décor.
    • Check Warranties: Look for warranties covering frame material, glass, and hardware. Installation warranties are also key.
    • Research Energy Star Criteria: Ensure the windows meet standards set by the Environmental Protection Agency for maximum efficiency.
    • Consult Professionals: Work with trusted companies like Ameritech Windows for expert advice on the best windows for your home.

    Conclusion

    Whether you’re buying house windows for the first time or replacing old windows, the right choice can transform your home. By focusing on aesthetics, functionality, and cost, you’ll find windows that meet your needs while saving you money on energy bills.

    At Ameritech Windows, we provide energy efficient windows with professional installation to ensure lasting performance. Contact us today to explore our selection of high-quality replacement windows and discover how we can enhance your home’s curb appeal and comfort.


    GET FREE QUOTE!

    Promo Ending Soon 05-01-2026

    SPRING SAVINGS Event
    Limited Time Only

    Colorado’s Premier Window & Door Specialists
    $395 OFF EACH WINDOW
    $795 OFF EACH DOOR
    $0 DOWN • 24 MONTHS NO INTEREST

    *With approved credit. See representative for details.

    Four-window minimum • New customers only
    Locally owned and operated in Colorado for over 30+ years

    Refresh Your Home for Spring — Lock In Your Savings Today

    Minimum purchase does apply and cannot be combined with any other discounts.*

    Deal is for first time customers only.**


    By submitting this form, I verify that the number provided is my mobile telephone number and I provide my express written consent for Ameritech Windows to contact me at this number via phone, email, and text message (SMS) using automated dialing technology for marketing purposes. I agree to the
    Terms and Conditions and
    Privacy Policy.
    Consent is not a condition of purchase. Message and data rates may apply. To opt out at any time, you may reply STOP to any text message or notify Ameritech Windows by telephone.