Category: Blog

  • Door Installation for Energy Efficiency: What You Need to Know

    Door Installation for Energy Efficiency: What You Need to Know

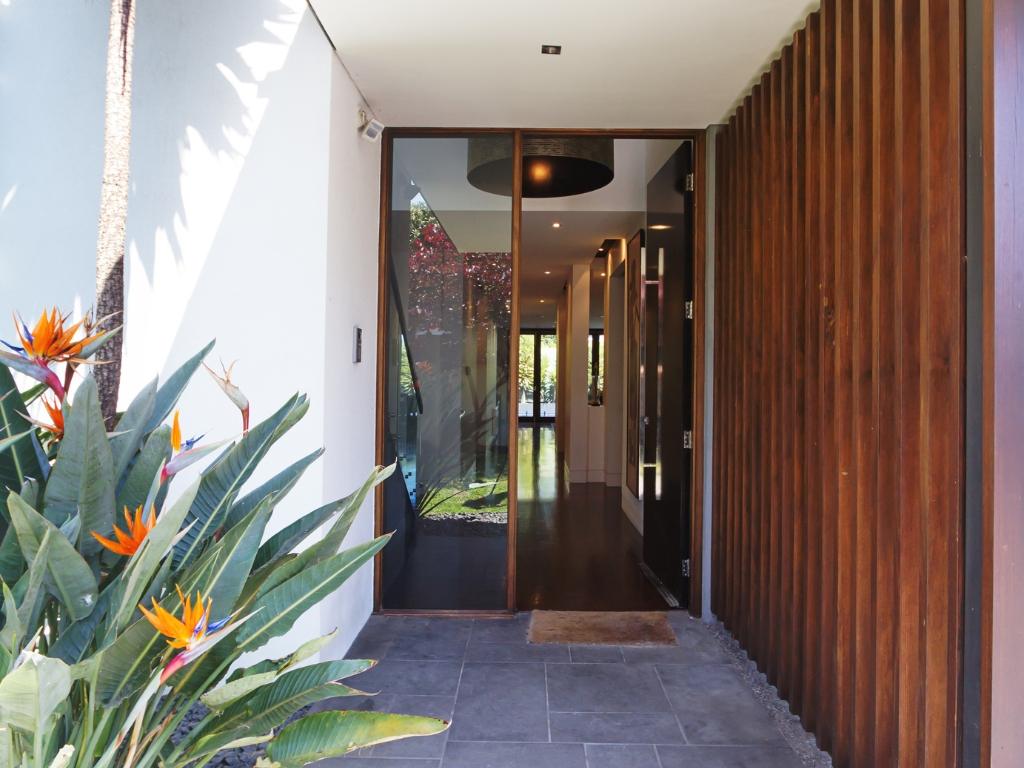
    Tired of drafty hallways or rooms that never seem to stay warm? Your door might be the reason.

    Old or poorly installed doors let in outside air, leak your heating or cooling, and drive up energy bills without you noticing. A new door, if installed right, can seal those gaps, cut waste, and keep your home more comfortable year-round.

    Before you schedule a door installation, here’s what you need to know to make sure it actually improves your home’s energy efficiency.

    Why Energy Efficiency Starts at the Door

    Your door is part of your home’s thermal barrier. If it’s outdated, damaged, or poorly installed, it becomes a weak spot where air slips in or out. Even a small gap can:

    • Raise heating and cooling costs year-round
    • Let in outdoor moisture and pests
    • Create uneven temperatures inside the home

    Many homeowners focus on windows and attic insulation but overlook the door. A tight, well-insulated door reduces this loss significantly.

    Signs Your Current Door Is Costing You Money

    Some signs are easy to miss because they happen gradually. Take a closer look if you’ve noticed:

    • Sunlight peeking through the edges

    If you can see light coming in around the doorframe, air is getting through too. That means warm air escapes in winter and hot air gets in during summer, making your HVAC system work harder.

    • Drafts when standing nearby

    Feeling cold air while the door is shut means the seal isn’t tight. Even a small draft can create uncomfortable temperature swings and raise your heating costs.

    • A door that drags or sticks

    When a door doesn’t open smoothly, it could mean the frame has shifted or the door has warped. Misalignment leads to poor sealing, allowing air leaks and moisture to slip in.

    • Energy bills that rise year after year

    If your usage hasn’t changed but your bill keeps climbing, the problem could be escaping air. Doors are often overlooked, but they play a big role in energy loss—especially older ones.

    • Old weatherstripping is falling apart

    Cracked or missing weatherstripping breaks the seal around your door. This creates gaps that let heat escape quickly, reducing energy efficiency and comfort.

    Focus on these over decorative features. They make a real difference in performance.

    What Makes a Door Energy Efficient?

    A door’s energy performance depends on more than its appearance or price tag. The right features work together to reduce heat loss and block outdoor air.

    • Insulated Core: Foam-filled cores help keep indoor temperatures stable.
    • Strong Weatherstripping: Seals around the edges keep air and moisture from slipping through.
    • Accurate Fit: A properly sized and hung door eliminates gaps that cause energy waste.
    • Low-E or Double-pane Glass: These glass options reduce heat gain and block harmful UV rays.
    • Energy Star Certification: This confirms the door meets federal standards for energy efficiency.

    What Type of Door Should You Choose?

    The right door for your home depends on what you care about most. Are you looking for better insulation, less upkeep, or just something that looks good and lasts?

    Before you decide, here’s a quick look at the pros and cons of the most common door types.

    Fiberglass Doors

    Pros:
    ✅ Good insulator
    ✅ Durable and low-maintenance
    ✅ Won’t warp or rot
    ✅ Versatile appearance

    Cons:
    ❌ Higher upfront cost than steel
    ❌ May crack under severe impact
    ❌ Color matching repairs can be tricky

    Steel Doors

    Pros:
    ✅ Strong and secure
    ✅ Affordable
    ✅ Fire-resistant and weather-resistant
    ✅ Low maintenance

    Cons:
    ❌ Requires a thermal break to reduce heat loss
    ❌ May dent or scratch easily
    ❌ Can rust over time, especially in coastal climates
    ❌ Feels cold to the touch in w

    Wood Doors

    Pros:
    ✅ Classic, high-end appearance
    ✅ Customizable
    ✅ Solid and heavy 

    Cons:
    ❌ Sensitive to moisture
    ❌ High maintenance
    ❌ Less efficient unless built with insulation
    ❌ Typically more expensive

    Glass Doors (Sliding or Patio Door)

    Pros:
    ✅ Brings in natural light
    ✅ Modern styles available
    ✅ Energy-efficient options 

    Cons:
    ❌ Poor insulation without upgraded glass
    ❌ Frame material affects efficiency
    ❌ Easier to break without reinforced glass
    ❌ Requires frequent cleaning

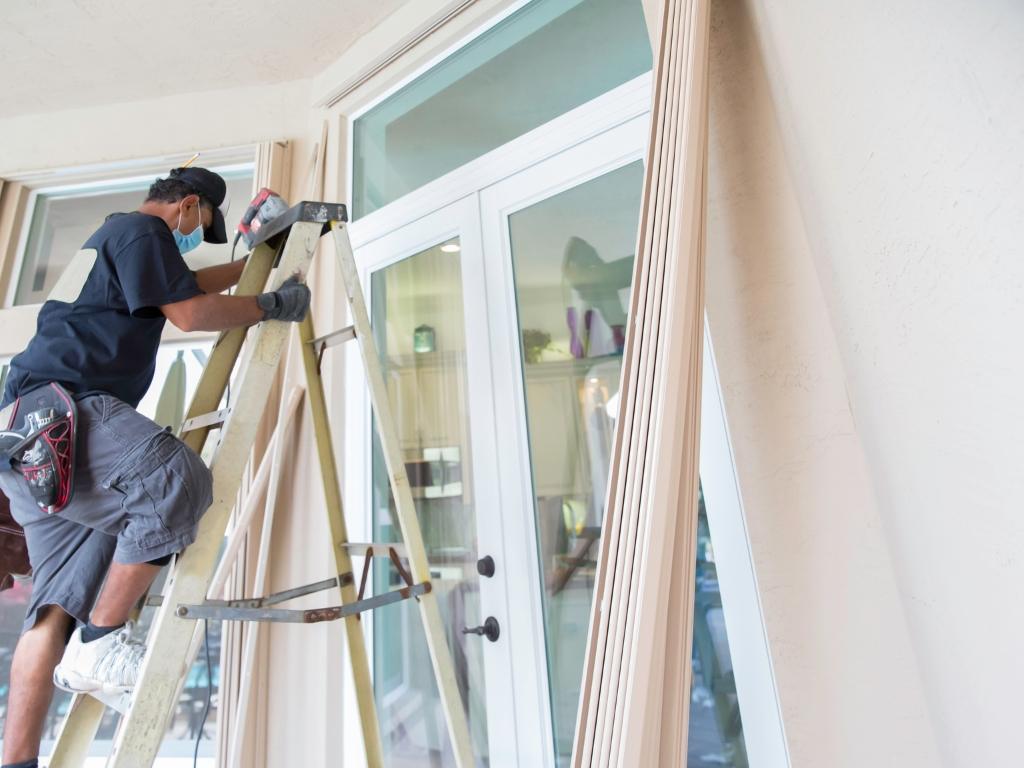
    The Role of Proper Door Installation

    Even the best-rated door won’t save energy if it’s installed poorly. The way the door is set, sealed, and insulated matters just as much as the door itself.

    Here’s what a proper install includes:

    • Measuring the frame and door slab precisely

    Accurate measurements ensure a snug fit, reducing the chance of gaps or uneven spacing around the frame.

    • Shimming the door so it sits square and plumb

    Shims are placed behind the hinges and frame to keep the door level and aligned, so it closes tightly every time.

    • Adding foam insulation around the frame

    Expanding foam fills in the space between the door frame and wall studs, blocking drafts and helping retain indoor temperatures.

    • Sealing with weatherproof caulk

    High-quality exterior caulk is used to seal the outer edges, protecting against wind, moisture, and air leaks.

    • Replacing worn or missing threshold seals

    A tight seal at the bottom of the door keeps cold air and pests from sneaking in underfoot.

    Skipping any of these steps can lead to performance issues, wasted energy, and premature wear. Proper installation helps your door last longer and perform as intended from day one.

    Common Door Installation Mistakes That Waste Energy

    Even a high-quality door can fail to perform if the installation is rushed or incomplete. These common mistakes cause most of the energy loss homeowners deal with after a new door is put in.

    Watch out for:

    • Too much space between the frame and the wall

    Large gaps around the frame let air flow in and out, especially if they’re not insulated or sealed properly.

    • No foam or insulation around the frame

    Leaving this step out means outside air can move freely through the open space around the door frame.

    • Improper hinge alignment

    If the hinges aren’t positioned correctly, the door may not sit flush, creating uneven gaps along the edges.

    • Missing sill pan or threshold seal

    Without these, water can seep under the door, leading to moisture damage, mold, and cold drafts.

    • Using interior caulk outdoors

    Interior-grade caulk can crack and peel when exposed to the sun and weather, making it useless for sealing exterior doors.

    Questions to Ask Before Hiring a Door Installer

    Make sure you hire someone who takes energy efficiency seriously. Ask:

    • What materials do you use to insulate the frame?
    • Do you seal around the door with foam and exterior caulk?
    • Will you replace the threshold and weatherstripping?
    • Do you test for air leaks after installation?
    • Do you guarantee your work in writing?

    If the installer skips insulation or cuts corners, it defeats the purpose of the door upgrade.

    Don’t Delay If Your Door Is a Problem

    Energy loss gets worse over time. So do drafts, swelling, and sticking. If you’re already noticing signs like:

    • Cold spots near the door
    • Spikes in energy bills
    • Visible damage to the door or frame

    …you’re already losing money and comfort. A new energy-efficient door, when installed properly, can fix those problems now.

    Ameritech Windows offers professional door installation that’s built for Colorado’s climate and designed to reduce energy waste. Ask for a free consultation if you’re ready to improve your home’s performance.


    GET FREE QUOTE!

    Promo Ending Soon 05-01-2026

    SPRING SAVINGS Event
    Limited Time Only

    Colorado’s Premier Window & Door Specialists
    $395 OFF EACH WINDOW
    $795 OFF EACH DOOR
    $0 DOWN • 24 MONTHS NO INTEREST

    *With approved credit. See representative for details.

    Four-window minimum • New customers only
    Locally owned and operated in Colorado for over 30+ years

    Refresh Your Home for Spring — Lock In Your Savings Today

    Minimum purchase does apply and cannot be combined with any other discounts.*

    Deal is for first time customers only.**


    By submitting this form, I verify that the number provided is my mobile telephone number and I provide my express written consent for Ameritech Windows to contact me at this number via phone, email, and text message (SMS) using automated dialing technology for marketing purposes. I agree to the
    Terms and Conditions and
    Privacy Policy.
    Consent is not a condition of purchase. Message and data rates may apply. To opt out at any time, you may reply STOP to any text message or notify Ameritech Windows by telephone.

  • Double Hung Windows Maintenance Tips Every Homeowner Should Know

    Double Hung Windows Maintenance Tips Every Homeowner Should Know

    Double hung windows are one of the most practical upgrades you can make to your home. They look clean, operate easily, and make ventilation a breeze.

    But even the best windows won’t perform well if you don’t take care of them. Fortunately, even simple maintenance can save you from drafts, sticky sashes, and costly repairs.

    Here’s what every homeowner needs to know to keep double hung windows working like they should.

    Tip #1: Clean the Tracks and Sashes Regularly

    Over time, dust and grime build up in the tracks and around the sashes. This causes sticking, makes the windows harder to open or close, and can damage the sliding components.

    DO:

    • Use a soft-bristle brush to loosen dirt before vacuuming.
    • Remove both sashes (if designed for it) for a more thorough cleaning.
    • Clean corners and edges with a damp cotton swab.

    DON’T:

    • Use bleach or harsh chemicals on vinyl or wood frames.
    • Let moisture pool in the track. Dry it completely after cleaning.
    • Force the sash open if it’s stuck. Clean first, then try again.

    Tip #2: Lubricate Moving Parts

    Double hung windows rely on smooth track movement and balance systems. Without lubrication, these parts wear down faster and cause drag or resistance when operating the sashes.

    DO:

    • Use a dry lubricant made for window tracks.
    • Wipe down the hardware with a clean cloth before applying any product.
    • Lubricate both vertical tracks, not just one side.

    DON’T:

    • Apply lubricant directly onto dirt or debris.
    • Use WD-40 or grease; it collects dust and clogs the track.
    • Over-lubricate! It can lead to drips and staining.

    Tip #3: Inspect the Locks and Tilt Mechanism

    The locking system and tilt-in feature are designed to secure the window and make cleaning easier. If these parts are loose or misaligned, the window may not seal properly or could fall inward during use.

    DO:

    • Test each lock by closing and securing the sash fully.
    • Check tilt latches for spring tension or cracking.
    • Tighten loose screws with the correct size screwdriver.

    DON’T:

    • Leave a sash tilted open longer than necessary; it stresses the mechanism.
    • Ignore rattling sounds; they often mean a loose or worn part.
    • Use excessive force when tilting the sash inward.

    Tip #4: Check the Weatherstripping

    Weatherstripping helps your window seal out air and water. When it wears out, it leads to drafts, energy loss, and moisture intrusion.

    DO:

    • Inspect weatherstripping at the beginning of each season.
    • Use replacement strips rated for your window frame material.
    • Press replacements in firmly and close the window to test for a snug seal.

    DON’T:

    • Paint over or seal damaged weatherstripping.
    • Overlap new strips on top of old ones; remove the old material first.
    • Use adhesives not designed for temperature fluctuations.

    Tip #5: Clean the Glass Without Damaging the Frame

    Clean glass improves visibility and appearance. But excess water or harsh tools can damage the window’s frame or seep into the interior components.

    DO:

    • Spray cleaner directly onto a cloth—not the glass—to control moisture.
    • Use a non-abrasive pad for stuck-on debris.
    • Clean window edges and corners where buildup collects.

    DON’T:

    • Use steel wool, razors, or abrasive brushes.
    • Let water drip into the sash cavity or balance track.
    • Clean on a hot, sunny day; it can cause streaking.

    Tip #6: Watch for Signs of Moisture or Fogging

    Moisture between the glass panes means the seal has failed. This reduces energy efficiency and could lead to mold or internal frame damage.

    DO:

    • Check windows in the morning. Condensation is more visible at cooler temperatures
    • Note whether fog is inside the glass or just on the surface.
    • Review your warranty if the windows were recently installed.

    DON’T:

    • Assume all condensation means a seal failure; check humidity levels in your home.
    • Delay repair if fogging persists; it only gets worse.
    • Drill holes in the window to “dry it out”. This voids most warranties

    Tip #7: Test Window Operation Each Season

    Double hung windows should glide open and stay put when released. If the sash slides down or gets stuck, parts may be worn, dirty, or misaligned.

    DO:

    • Open each sash halfway and check if it stays in place.
    • Listen for grinding or clicking sounds during movement.
    • Confirm the lock engages smoothly when both sashes are closed.

    DON’T:

    • Jam the sash open if it won’t move. Inspect tracks first.
    • Force locks that don’t align. Adjust the sash positioning instead.
    • Ignore one sticky window; others may soon follow.

    Tip #8: Keep Exterior Frames Free of Buildup

    Dirt, mildew, and debris on the outside of the frame can cause discoloration or long-term damage. Regular cleaning improves appearance and function.

    DO:

    • Rinse the frame with low-pressure water.
    • Use a mild detergent and a soft brush for stubborn buildup.
    • Clean away cobwebs or organic material trapped in corners.

    DON’T:

    • Use a power washer near the windows.
    • Let water or soap sit on the surface for too long.
    • Ignore spots near rooflines or trees; they attract more grime.


    When to Call a Professional

    Not all issues are DIY-friendly. If your double hung windows are drafty, misaligned, or you’re noticing wood rot, bring in an expert.

    You should call for help if:

    • The sash is warped or cracked.
    • The balance springs are broken or stuck.
    • You see signs of water damage inside your walls.


    Stay Consistent

    Double hung windows are low-maintenance, but not no-maintenance. A quick seasonal check takes less than 10 minutes per window and saves you money over time.

    Here’s an effective maintenance checklist:

    • Clean tracks and sashes.
    • Lubricate moving parts.
    • Inspect locks and tilt latches.
    • Check and replace weatherstripping.
    • Clean glass and frames.
    • Look for fogging or seal failure.
    • Test operation.
    • Wash exterior frames. 

    Need Help With Your Double-Hung Windows?

    Routine maintenance keeps your windows working, but some issues require a professional touch. Whether you’re dealing with drafty sashes, foggy glass, or worn-out hardware, Ameritech Windows is here to help!

    Get in touch today to schedule a window inspection, request repairs, or explore energy-efficient replacements tailored to your home.


    GET FREE QUOTE!

    Promo Ending Soon 05-01-2026

    SPRING SAVINGS Event
    Limited Time Only

    Colorado’s Premier Window & Door Specialists
    $395 OFF EACH WINDOW
    $795 OFF EACH DOOR
    $0 DOWN • 24 MONTHS NO INTEREST

    *With approved credit. See representative for details.

    Four-window minimum • New customers only
    Locally owned and operated in Colorado for over 30+ years

    Refresh Your Home for Spring — Lock In Your Savings Today

    Minimum purchase does apply and cannot be combined with any other discounts.*

    Deal is for first time customers only.**


    By submitting this form, I verify that the number provided is my mobile telephone number and I provide my express written consent for Ameritech Windows to contact me at this number via phone, email, and text message (SMS) using automated dialing technology for marketing purposes. I agree to the
    Terms and Conditions and
    Privacy Policy.
    Consent is not a condition of purchase. Message and data rates may apply. To opt out at any time, you may reply STOP to any text message or notify Ameritech Windows by telephone.

  • The Best Energy Efficient Windows for Modern and Historic Homes

    The Best Energy Efficient Windows for Modern and Historic Homes

    Not all windows are made to perform the same. If your home feels drafty or your energy bill keeps rising, your windows could be part of the problem. Replacing them with the best energy efficient windows can help you fix that, without compromising the look of your home.

    Whether you own a sleek modern home or a charming historic one, the right windows can improve comfort, reduce energy loss, and match your home’s style.

    What Makes a Window Energy Efficient?

    Energy efficient windows aren’t just about double panes. Look for these features:

    • Low-E Glass: Reduces heat transfer by reflecting UV and infrared light.
    • Multiple Panes: Double or triple panes with insulating gas in between.
    • Gas Fills: Argon or krypton gases improve thermal insulation.
    • Warm Edge Spacers: Keep panes evenly separated and minimize heat loss.
    • Insulated Frames: Vinyl, fiberglass, or composite materials reduce thermal bridging.
    • Certified Ratings: Look for Energy Star or NFRC (National Fenestration Rating Council) labels.

    Why does this matter? Because these features directly affect how much energy your windows trap or let escape.

    Best Window Styles for Modern Homes

    Modern homes emphasize clean lines and wide, open views. The right window style should reflect that simplicity while boosting efficiency.

    1. Casement Windows

    These windows swing outward like a door and close tightly against the frame. That seal keeps drafts out and helps with insulation. Casement windows work well for large, uninterrupted glass areas in modern homes.

    2. Picture Windows

    Picture windows are fixed and don’t open, so there’s no risk of air leakage. They offer clear views and allow more sunlight in. They’re ideal for main living rooms, hallways, and staircases.

    3. Sliding Windows

    Sliding windows move horizontally, making them great for rooms where vertical space is limited. They’re often wider than tall and easier to clean and maintain than double-hung styles.

    4. Fixed Windows in Custom Shapes

    Fixed windows come in geometric forms that complement modern design. With no moving parts, they’re also more energy efficient. These are often used for accent walls or high ceilings.

    When choosing windows for modern homes, look for narrow frames, dark colors, and simple shapes. Just don’t sacrifice quality glass or insulation.

    Best Window Styles for Historic Homes

    Historic homes need windows that match their original look — but with modern performance built in.

    1. Double-Hung Windows

    These windows slide open from the top or bottom. They’re easy to clean and still look appropriate for many historic homes. Double-hung windows are a good all-around choice for older properties.

    2. Bay or Bow Windows

    Bay and bow windows project outward from the home, creating more interior space. They were common in older homes and are now built with modern insulated glass for better energy control.

    3. Wood-Clad Windows

    Wood-clad windows offer real wood interiors for a classic look and low-maintenance exteriors for durability. You can choose custom stains and grille patterns to match your home’s era.

    4. Custom Grille Patterns

    Today’s windows can mimic the divided panes of original windows without losing efficiency. Custom grilles paired with Low-E glass and double glazing help you maintain the style while saving energy.

    How Do You Choose the Right Windows?

    Start with your home’s needs, then consider these steps:

    • Assess your climate. Cold areas benefit from triple-pane; warm climates need solar control.
    • Check your home’s exposure. South-facing windows may need stronger UV protection.
    • Consider your utility bills. Older windows can leak up to 30% of a home’s heating and cooling energy.
    • Balance looks with function. Don’t over-prioritize aesthetics at the expense of insulation or durability.
    • Work with a trusted installer. Poor installation can cancel out even the best window technology.

    Why It Pays to Invest in Energy Efficient Windows

    Many homeowners recoup a portion of window upgrade costs through rebates, tax credits, or long-term energy savings.

    • Lower Energy Costs: Energy efficient windows reduce heating and cooling loss, saving you money year after year. Read more here: How to Minimize Electric Bills with Energy-Efficient Windows
    • More Comfort: They help maintain consistent indoor temperatures and eliminate drafts.
    • Better Resale Value: Buyers often look for homes with energy upgrades, making your home more appealing and competitive.
    • Less Noise: Multi-pane glass and insulating gas layers block out more exterior noise than single-pane windows.
    • UV Protection: Low-E coatings filter harmful UV rays, helping to protect your floors, furniture, and curtains from fading.

    Final Thoughts

    You don’t have to choose between beauty and performance. The best energy efficient windows offer both.

    If you’re planning a remodel or restoring an older home, pick a window style that enhances your home’s character while upgrading your home’s comfort and energy performance.

    Need help making the right choice? Ameritech Windows can help you find the best fit for your home style and your energy goals. Reach out for a quote or consultation.


    GET FREE QUOTE!

    Promo Ending Soon 05-01-2026

    SPRING SAVINGS Event
    Limited Time Only

    Colorado’s Premier Window & Door Specialists
    $395 OFF EACH WINDOW
    $795 OFF EACH DOOR
    $0 DOWN • 24 MONTHS NO INTEREST

    *With approved credit. See representative for details.

    Four-window minimum • New customers only
    Locally owned and operated in Colorado for over 30+ years

    Refresh Your Home for Spring — Lock In Your Savings Today

    Minimum purchase does apply and cannot be combined with any other discounts.*

    Deal is for first time customers only.**


    By submitting this form, I verify that the number provided is my mobile telephone number and I provide my express written consent for Ameritech Windows to contact me at this number via phone, email, and text message (SMS) using automated dialing technology for marketing purposes. I agree to the
    Terms and Conditions and
    Privacy Policy.
    Consent is not a condition of purchase. Message and data rates may apply. To opt out at any time, you may reply STOP to any text message or notify Ameritech Windows by telephone.

  • Are Triple Pane Windows Worth It? Pros, Cons, and Cost Breakdown

    Are Triple Pane Windows Worth It? Pros, Cons, and Cost Breakdown

    Thinking about upgrading your windows? Triple pane windows are becoming a popular choice for homeowners who want better comfort, lower energy bills, and a quieter home.

    But are they really worth the investment?

    In this guide, we’ll break down the benefits, drawbacks, and costs so you can decide if triple pane windows are the right fit for your home and your budget.

    What Are Triple Pane Windows?

    Triple pane windows have three layers of glass with two insulating spaces in between. These spaces are typically filled with argon or krypton gas, which slows down heat transfer better than air. This design gives you more insulation than a standard double pane window.

    The frame, glass coatings (like low-E), and gas fills all work together to reduce:

    • Heat loss in winter
    • Heat gain in summer
    • Outside noise
    • UV damage to furniture and floors

    Triple pane windows are commonly used in colder climates but are becoming more popular in a wide range of homes due to rising energy costs.

    Benefits of Triple Pane Windows

    Triple pane windows come with a range of benefits that appeal to homeowners looking for long-term comfort, efficiency, and value. Here’s what they can do for your home.

    1. Lower Energy Bills

    With better insulation, triple pane windows reduce heat transfer. Your HVAC system works less, and your energy bills go down.

    2. Better Noise Reduction

    The extra glass layer and gas fill help block out common outdoor noise, making your home quieter and more relaxing.

    3. Improved Comfort

    Triple pane windows help stabilize indoor temperatures. You’ll notice fewer drafts in winter and less heat buildup in summer.

    4. Enhanced Security

    These windows are harder to break than standard ones. That extra layer adds durability and peace of mind.

    5. Increased Home Value

    Buyers care about energy efficiency. Installing triple pane windows can make your home more appealing when it’s time to sell.

    Downsides to Consider

    While triple pane windows offer major advantages, there are a few trade-offs to think through. Make sure you’re aware of these before committing.

    1. Higher Upfront Cost

    They cost more than double-pane windows. You’ll save over time, but the initial investment is higher.

    2. Heavier Weight

    The extra glass makes them heavier. Some frames may need reinforcement, especially in older homes.

    3. Limited ROI in Mild Climates

    In areas with mild weather, you might not save enough on energy to justify the upgrade.

    Triple Pane vs Double Pane Windows

    Still deciding between the two? Here’s a side-by-side comparison:

    Feature Double Pane Triple Pane
    Glass Layers 2 3
    Insulated Chambers 1 2
    Energy Efficiency Good Excellent
    Noise Reduction Moderate High
    Weight Lighter Heavier
    Cost More affordable More expensive
    Ideal Use Mild/moderate climates Cold/noisy climates

    If you want to reduce noise and boost insulation, triple pane wins. But if you’re mostly trying to save on cost and you’re in a milder area, double pane might do the job just fine.

    How Much Do Triple Pane Windows Cost?

    Here’s what you can expect for a full replacement with triple pane windows:

    • Cost per window installed: $800–$1,500
    • Cost per window without labor: $400–$900
    • Average whole-home cost: $12,000–$25,000+ (based on 15–20 windows)

    Your actual price will vary based on:

    • Frame material (vinyl, wood, fiberglass)
    • Window style (casement, slider, bay, etc.)
    • Energy certifications (ENERGY STAR, U-factor ratings)
    • Contractor rates in your area

    You’ll also want to check for rebates or energy efficiency programs in your state. These can help reduce your upfront cost.

    When Are Triple-Pane Windows Worth It?

    Triple pane windows don’t just perform better; they also make your home quieter, more secure, and more comfortable. Consider them if:

    • Your home has high heating or cooling costs.
    • You live in a cold or hot climate with large seasonal swings.
    • Outside noise is a daily issue.
    • You want long-term savings and comfort.
    • You’re already replacing old windows and are willing to invest more upfront.

    When You Might Skip Them

    They may not be right for everyone. You might hold off if:

    • Your budget is tight.
    • You’re flipping or selling soon.
    • Your area has a mild climate year-round.
    • You already have well-sealed, efficient double-pane windows.

    In these cases, upgrading might not give you the return you expect.

    Final Thoughts

    Triple pane windows offer solid benefits, especially for homeowners who value comfort, efficiency, and long-term savings. But the higher price tag means you should weigh the pros and cons carefully.

    Looking for expert advice on what works best for your home? Ameritech Windows offers guidance and high-quality installations that match your needs and budget.


    GET FREE QUOTE!

    Promo Ending Soon 05-01-2026

    SPRING SAVINGS Event
    Limited Time Only

    Colorado’s Premier Window & Door Specialists
    $395 OFF EACH WINDOW
    $795 OFF EACH DOOR
    $0 DOWN • 24 MONTHS NO INTEREST

    *With approved credit. See representative for details.

    Four-window minimum • New customers only
    Locally owned and operated in Colorado for over 30+ years

    Refresh Your Home for Spring — Lock In Your Savings Today

    Minimum purchase does apply and cannot be combined with any other discounts.*

    Deal is for first time customers only.**


    By submitting this form, I verify that the number provided is my mobile telephone number and I provide my express written consent for Ameritech Windows to contact me at this number via phone, email, and text message (SMS) using automated dialing technology for marketing purposes. I agree to the
    Terms and Conditions and
    Privacy Policy.
    Consent is not a condition of purchase. Message and data rates may apply. To opt out at any time, you may reply STOP to any text message or notify Ameritech Windows by telephone.

  • What Are Hopper Windows? A Simple Guide for Homeowners

    What Are Hopper Windows? A Simple Guide for Homeowners

    Picking the right window for a small or low wall space isn’t always easy. You want something that lets in fresh air, brings in some light, and still fits the space without messing with your home’s insulation or security.

    That’s where hopper windows come in.

    They’re small, practical, and made for places like basements and bathrooms, areas where regular windows just don’t work. If you’re wondering what hopper windows are and whether they make sense for your home, this guide walks you through the basics.

    What Is a Hopper Window?

    A hopper window is a small window that opens inward from the top, using hinges placed along the bottom of the frame. It tilts into your home when opened and closes securely against the frame when shut.

    You’ll typically see hopper windows installed in spaces where wall space is limited, such as a basement, laundry room, or small bathroom. 

    They’re not designed to offer wide views or full ventilation like double-hung or large casement windows. Instead, they provide just enough airflow and light where it’s needed most.

    How Do Hopper Windows Open?

    Hopper windows operate on a bottom-hinge mechanism. You unlock a latch or handle located at the top, and the window tilts inward. 

    Some models feature a crank system that provides more control during opening and closing. Others have a simple latch you can release with one hand.

    This inward tilt helps shield the interior of your home from rain, making hopper windows useful in damp environments like bathrooms or laundry areas.

    Because they open inward, they’re easy to open and close without having to reach too far. But that also means they can get in the way of curtains or blinds. So, they work best in areas where you don’t need window treatments or where privacy is already built-in.

    Where Do Homeowners Use Hopper Windows?

    Hopper windows are most often used in specific, space-limited parts of the home. These are places where a standard window may not fit, or where ventilation is still needed despite wall constraints.

    Common places to install hopper windows include:

    • Basements – Where wall height is low and airflow is limited
    • Bathrooms – To let in air and natural light while maintaining privacy
    • Laundry Rooms – To reduce moisture buildup and allow for better air circulation
    • Garage Walls – When you need a small window to brighten up the space

    Some homeowners even install them near ceilings in walk-in closets or hallways for extra light without compromising privacy.

    Pros of Hopper Windows

    Hopper windows offer specific advantages that make them worth considering—especially in areas with space or ventilation concerns.

    Here’s what makes them appealing:

    • Space-saving: Their compact design fits in small or awkward wall spaces, especially in basements and half-baths.
    • Ventilation: Even though they’re small, hopper windows can significantly improve air circulation in enclosed areas.
    • Energy Efficiency: When properly sealed, they offer excellent insulation and reduce drafts. Many models are available with insulated glass.
    • Security: Due to their small size and inward opening, they’re harder to tamper with from the outside.
    • Affordability: Hopper windows are generally less expensive than full-size windows, both in terms of materials and installation.

    Cons of Hopper Windows

    Hopper windows also come with a few limitations. Understanding these upfront can help you make a smarter choice for your home.

    Here are the downsides to consider:

    • Limited View: Their small size means you won’t get much natural light or an open outdoor view.
    • Obstructs Interior Space: Since they open inward, they can interfere with shelves, counters, or curtains if not positioned carefully.
    • Challenging Exterior Cleaning: It can be hard to clean the outside of a hopper window, especially when it’s installed in a deep window well or tight exterior space.
    • Not Suitable for Every Room: Hopper windows don’t work well in living rooms or bedrooms where natural light and visibility are more important.

    Ask yourself: Is this window meant to enhance aesthetics, or does it just need to solve a ventilation or space issue? That distinction will help determine whether hopper windows are the right fit.

    Are Hopper Windows Energy-Efficient?

    Yes, hopper windows can be energy-efficient if you choose models with the right features.

    Because they seal tightly against the frame when closed, they’re less prone to air leaks. Many options are designed with weatherstripping, foam insulation, and multi-pane glass to help maintain indoor temperatures.

    For better performance, look for:

    • Double-pane or Triple-pane Glass: These reduce heat loss and help with sound insulation.
    • Low-E Coatings: Reflect heat and reduce solar gain, especially useful in warmer climates.
    • Energy Star Ratings: These ensure the window meets specific energy-efficiency standards.

    Over time, the energy savings from a well-insulated hopper window can offset its initial installation cost, especially in drafty areas like basements.

    Can You Install Hopper Windows Yourself?

    Technically, yes. But it’s not a simple task.

    Installing a hopper window requires precise framing, sealing, and waterproofing, especially if it’s going into a foundation wall or replacing an old unit. A poor installation can lead to water intrusion, air leaks, or mold issues.

    DIY installation might work if:

    • You’re replacing a same-size window in an accessible area.
    • You have experience with cutting and framing.
    • You’re confident in sealing and flashing techniques.

    However, it’s often better to hire a professional, especially for basement installs or code-compliant replacements. An expert can ensure that the window fits properly, prevents moisture issues, and meets your local building codes.

    Should You Replace an Old Basement Window With a Hopper Style?

    In many homes, yes.

    Older basement windows, especially metal-framed or glass block types, often don’t open. They let in little air and may leak or fog up with condensation.

    Replacing these with hopper windows offers multiple benefits:

    • Better Airflow – Helps dry out damp basement spaces.
    • Improved Insulation – New materials and seals reduce drafts.
    • Modern Look – Updates the appearance without major remodeling.

    If you’re finishing your basement or trying to improve airflow in a low-wall area, hopper windows offer one of the most straightforward upgrades you can make.

    The Bottom Line

    Hopper windows fill a specific need in residential construction. They’re compact, functional, and ideal for spaces where standard windows won’t work.

    If you’re looking to improve airflow in a basement, bathroom, or laundry room without breaking your budget, they’re a smart option.

    Need help picking the right size or model? Ameritech Windows can walk you through available options and recommend the best fit for your space and budget.


    GET FREE QUOTE!

    Promo Ending Soon 05-01-2026

    SPRING SAVINGS Event
    Limited Time Only

    Colorado’s Premier Window & Door Specialists
    $395 OFF EACH WINDOW
    $795 OFF EACH DOOR
    $0 DOWN • 24 MONTHS NO INTEREST

    *With approved credit. See representative for details.

    Four-window minimum • New customers only
    Locally owned and operated in Colorado for over 30+ years

    Refresh Your Home for Spring — Lock In Your Savings Today

    Minimum purchase does apply and cannot be combined with any other discounts.*

    Deal is for first time customers only.**


    By submitting this form, I verify that the number provided is my mobile telephone number and I provide my express written consent for Ameritech Windows to contact me at this number via phone, email, and text message (SMS) using automated dialing technology for marketing purposes. I agree to the
    Terms and Conditions and
    Privacy Policy.
    Consent is not a condition of purchase. Message and data rates may apply. To opt out at any time, you may reply STOP to any text message or notify Ameritech Windows by telephone.

  • What Are Garden Windows? Benefits & Best Uses Explained

    What Are Garden Windows? Benefits & Best Uses Explained

    A garden window does more than improve your view—it gives you light, fresh air, and a little extra space you’ll actually use. In this guide, you’ll learn exactly what garden windows are, where they work best in your home, and what to think about before you start the installation. 

    Whether you’re looking to grow herbs indoors or just want more sunlight in your kitchen, this will help you decide if it’s the right upgrade for you.

    What Is a Garden Window?

    A garden window is a three-dimensional window unit that extends outward from your home’s exterior wall. It’s similar to a small bay window but designed specifically to serve as a mini-greenhouse.

    Notable differences from conventional windows include the following:

    • It protrudes 12 to 24 inches outward, creating a shelf space.
    • It has glass on four sides: the front, two angled sides, and the top.
    • Some include casement-style side panels for ventilation.

    Garden windows are usually installed above kitchen sinks or counters, where you can place herbs, small plants, or decorative items. They’re functional, attractive, and bring more sunlight into your home.

    Why Homeowners Choose Garden Windows

    Garden windows come with several practical benefits that go beyond appearance. From adding natural light to creating space for plants or storage, here’s why many homeowners see them as a smart upgrade.

    1. More Natural Light

    Garden windows are designed with angled glass panels that let sunlight in from multiple directions. This makes a noticeable difference in rooms that usually feel dim or rely heavily on overhead lighting. 

    If your kitchen or laundry room doesn’t get much natural light, a garden window can brighten the space throughout the day without the need for extra fixtures.

    2. Better Ventilation

    Many garden windows include side panels that open outward. These vents create natural airflow, which helps cool the room and release moisture or cooking odors. 

    In kitchens, this feature is especially useful when prepping food or running appliances. It also benefits your plants, giving them the fresh air they need to thrive indoors.

    3. Indoor Garden or Storage Space

    The shelf area built into a garden window gives you extra space you can actually use. Whether you grow herbs like basil or parsley, or simply display a few succulents, the setup keeps plants within reach and in full view. 

    You can also use it for lightweight storage—cookbooks, small jars, or decorative bowls all fit well and stay easily accessible.

    4. Enhanced Outdoor Views

    Because the window extends outward, it gives you a wider, more open view than a flat window. This makes small rooms feel bigger and more connected to the outside world. 

    You get a clearer look at your yard, garden, or patio, whether you’re cooking, cleaning, or just enjoying your space.

    5. Architectural Detail

    A garden window changes how a room looks and feels, both inside and out. From the curb, it adds depth and character to your home’s exterior. Inside, it becomes a functional focal point that’s more than just a window. 

    These design improvements can add real value, especially if you plan to sell your home in the future.

    Best Places to Install Garden Windows

    Not every room or wall is suitable for a garden window. Choose locations that offer the right balance of light, visibility, and convenience.

    ✔ Kitchen Sink

    The kitchen sink is the most popular location for a garden window—and for good reason. It brings in natural light right where you prepare meals, wash dishes, and spend time throughout the day. 

    The built-in shelf offers a perfect spot for small potted herbs, adding freshness and function to your kitchen.

    It’s also one of the easiest places to care for plants, since it’s within arm’s reach and close to a water source. Most kitchen sink areas already have ventilation or an existing window, which makes window installation more straightforward and cost-effective.

    ✔ Laundry Room

    A garden window can transform a basic laundry room into a more pleasant space. The extra sunlight helps brighten a part of the home that often feels closed off or forgotten. 

    The added shelf also serves a practical purpose: holding detergents, dryer sheets, or even a few low-maintenance plants.

    Natural light makes the room feel larger, and the view outside adds a little relief from the task-focused environment. It’s a simple way to make laundry less of a chore while adding warmth to the space.

    ✔ Breakfast Nook or Dining Area

    In a breakfast nook or small dining space, a garden window can improve the entire feel of the room. It lets in gentle morning or midday light, creating a relaxed and inviting spot to enjoy meals.

    If your eating area is compact, the window adds openness without changing the room’s layout. It also allows for airflow during warmer months and gives you a place to display small décor items, plants, or seasonal accents that tie into your home’s style.

    Locations to Avoid

    Some spots in your home may not be ideal for a garden window. Here’s where installation can cause more trouble than benefit:

    • Behind large appliances or furniture: If the window is blocked, it becomes hard to access for cleaning, watering plants, or opening the vents.
    • Facing a neighbor’s window or close property line: This can create privacy concerns and uncomfortable sightlines for both households.
    • South-facing walls in hot climates: Without UV-blocking glass, too much direct sunlight can lead to overheating and increase cooling costs.
    • Areas without structural support: Installing a window in a wall not built for the added weight may require expensive framing or reinforcement.
    • Rooms where moisture is a concern but ventilation is limited: Poor airflow can cause condensation to build up, which may damage surrounding materials over time.

    Before you choose a location, think about how the space is used and whether the window will remain practical day to day.

    Materials and Customization Options

    Garden windows come in a variety of materials and configurations. Each option impacts cost, maintenance, and long-term durability.

    Frame Materials

    • Vinyl: Vinyl is the most popular choice because it offers energy efficiency, low maintenance, and affordability.
    • Wood: Wood provides a warm, natural look but requires regular sealing and painting to stay in good condition.
    • Fiberglass: Fiberglass is strong, stable in extreme weather, and long-lasting, though it tends to be more expensive.
    • Aluminum: Aluminum is lightweight and durable, but it can transfer heat unless it includes a thermal break.

    Glass Options

    • Double-pane or Triple-pane: These glass types provide insulation, helping to reduce heat transfer and improve energy efficiency.
    • Low-E Coating: Low-E coating reflects UV rays, which helps lower indoor temperatures and prevents fabric and surface fading.
    • Tempered Glass: Tempered glass is more resistant to breaking, making it a safer option for high-impact areas.

    Features and Add-ons

    • Operable Side Vents: These vents can be opened to allow airflow, improving ventilation in kitchens, laundry rooms, or small spaces.
    • Shelves: Built-in glass or wood shelves provide extra space for displaying plants, storing kitchen items, or adding decorative touches.
    • Custom Grilles: Grilles can be customized to match the design of your existing windows for a consistent appearance.
    • Interior Color/Finish: Garden windows are available in finishes like white, tan, or woodgrain to blend with your interior style.

    Are Garden Windows Energy Efficient?

    They can be, as long as you choose the right materials and features. Energy efficiency depends on:

    • Insulated Glass: Double or triple panes reduce heat transfer
    • Tight Seals: Prevent drafts, condensation, and moisture damage
    • Frame Construction: Vinyl and fiberglass insulate better than aluminum
    • Glass Treatments: Low-E coatings reduce sun’s heat while letting in light

    Warning: Poorly installed or single-pane units can lose heat in winter and allow excess heat in summer. That can cancel out the benefits.

    If energy savings matter to you, check for ENERGY STAR® certified units and ask about the U-factor and SHGC (Solar Heat Gain Coefficient) ratings before buying.

    Pros of Garden Windows

    • Brings in more light and airflow
    • Adds usable indoor shelf space
    • Boosts resale appeal in most markets
    • Customizable to your home’s design
    • Great for indoor gardening or small displays

    Cons of Garden Windows

    • Higher upfront cost than flat windows
    • Needs cleaning on multiple glass surfaces
    • May require structural changes to install
    • Less privacy than traditional windows
    • Some models may protrude into walkways or exterior paths

    Ask Yourself

    Is the added light, space, and visibility worth the cost and upkeep? If the answer is yes, then a garden window is a smart upgrade.

    Is a Garden Window Right for Your Home?

    This type of window is worth considering if:

    • You want to grow herbs, succulents, or plants indoors
    • Your kitchen or laundry room feels dark or boxed in
    • You like opening up the view to your yard or garden
    • You’re planning a kitchen remodel and want more light without removing walls

    It may not be the right choice if:

    • You’re on a tight renovation budget
    • You need full privacy in the room
    • Your wall space is blocked or hard to access

    If you’re still unsure, consult with a window specialist who can evaluate your home’s layout and needs.

    Why Homeowners Choose Ameritech Windows

    At Ameritech Windows, we’ve helped thousands of Colorado homeowners upgrade their spaces with energy-efficient, well-crafted garden windows.

    We offer:

    • Custom window sizing and design
    • High-performance vinyl and glass
    • Precision installation from trained technicians
    • Clear pricing with no hidden fees

    You get a window that lasts, and a team that stands behind it. Want to learn more? Call now or request a free in-home consultation.


    GET FREE QUOTE!

    Promo Ending Soon 05-01-2026

    SPRING SAVINGS Event
    Limited Time Only

    Colorado’s Premier Window & Door Specialists
    $395 OFF EACH WINDOW
    $795 OFF EACH DOOR
    $0 DOWN • 24 MONTHS NO INTEREST

    *With approved credit. See representative for details.

    Four-window minimum • New customers only
    Locally owned and operated in Colorado for over 30+ years

    Refresh Your Home for Spring — Lock In Your Savings Today

    Minimum purchase does apply and cannot be combined with any other discounts.*

    Deal is for first time customers only.**


    By submitting this form, I verify that the number provided is my mobile telephone number and I provide my express written consent for Ameritech Windows to contact me at this number via phone, email, and text message (SMS) using automated dialing technology for marketing purposes. I agree to the
    Terms and Conditions and
    Privacy Policy.
    Consent is not a condition of purchase. Message and data rates may apply. To opt out at any time, you may reply STOP to any text message or notify Ameritech Windows by telephone.

  • What to Know Before Installing New Patio Doors

    What to Know Before Installing New Patio Doors

    If you’re thinking about replacing your patio doors, you’re not alone. Old doors can be drafty, difficult to operate, or just not match your home’s style anymore. But a successful replacement involves more than picking something that looks nice. 

    From layout to material, and even building codes—there’s a lot to consider before you install. In this blog, we’ll walk through the essentials so your next patio door upgrade is smooth, smart, and built to last.

    1. Start With Why You’re Replacing the Doors

    Before you even browse options, take a step back and ask what’s driving this project. Are your current doors leaking air or water? Do they drag when you open them? Maybe you’re renovating and want something that fits your new style. 

    Identifying the core issue helps you avoid wasting money on upgrades that don’t solve the real problem. If energy efficiency is the concern, prioritize insulated glass and tight seals. If security is the issue, stronger frames and better locks should top your list. 

    When you know the reason behind the change, you’re more likely to choose a door that actually improves your home.

    2. Choose a Door Style That Fits Your Layout

    Not all patio doors work in every space. Pick the wrong style, and you might run into issues with clearance, usability, or how the door looks in your room.

    • Sliding Doors
      These run on a track and don’t swing open, so they’re perfect for tighter spaces where you still want full-glass access to the outdoors.

    • French Doors
      These open from the center and add a traditional look. They require more room to swing but offer a grand entry feel that many homeowners love.

    • Bi-Fold Doors
      With folding panels that stack to the side, bi-folds open up your entire wall. They’re great for large patios or modern layouts with wide access points.

    • Multi-Slide Doors
      Similar to sliders, but with more panels that stack or tuck into a wall pocket. These are ideal when you want wide openings without folding panels.

    • Center-Hinged Doors
      One panel opens while the other stays fixed. These provide a classic look with a bit more functionality than a standard single door.

    Choosing a style that works with your room’s layout saves you from issues later—like blocked furniture, awkward openings, or wasted space.

    3. Pick the Right Frame Material for Your Needs

    The material of your patio door frame impacts everything from energy performance to maintenance. 

    Vinyl

    • Affordable and energy-efficient
    • Requires little maintenance
    • Limited in color and finish options

    Fiberglass

    • Handles extreme climates well
    • Resists warping and mimics wood appearance
    • Higher upfront cost but longer lifespan

    Wood

    • Offers a natural, traditional look
    • Popular for curb appeal
    • Needs regular sealing or painting to prevent rot

    Aluminum

    • Sleek and modern design
    • Durable and lightweight
    • Poor insulator unless paired with thermal breaks

    Each material has trade-offs, so think about your local climate, how much upkeep you’re willing to do, and how long you want the doors to last. Skipping this decision can mean higher utility bills or costly maintenance down the road.

    4. Understand the Role of Glass

    The glass in your patio door affects more than just the view—it influences how your home feels year-round. 

    Insulated double- or triple-pane glass keeps indoor temperatures stable by reducing heat transfer. Low-E coatings reflect infrared heat and block UV rays, which helps protect your furniture from fading and keeps your home cooler in summer. 

    Some doors come with argon or krypton gas between panes for even better insulation. If you live in a high-wind or active area, tempered or laminated glass is safer—it won’t shatter into sharp pieces if broken.

    Choosing the right glass setup boosts comfort, lowers energy costs, and adds an extra layer of safety—all without sacrificing natural light.

    5. Don’t Guess on Measurements

    Getting accurate measurements is one of the most important parts of the process. And it’s where many homeowners make mistakes. 

    You can’t just measure the old door and assume the new one will fit. You need to know the width and height of the rough opening, wall thickness, and even the direction the door will swing if you’re installing a hinged model.

    Incorrect measurements can lead to gaps, air leaks, or a door that simply doesn’t close properly. That’s why it’s often worth having a professional handle this part—they’ll account for everything, including potential wall shifts or framing issues.

    6. Double-Check Permits and HOA Rules

    You may need approval before you install a new patio door—especially if you’re making structural changes or live in a planned community.

    • City or county permits may be required if you’re enlarging the opening, modifying structural framing, or installing safety-rated glass.
    • HOA guidelines might restrict door styles, materials, or colors to keep a uniform look across the neighborhood.
    • Building codes often dictate glass type (like tempered or laminated) for safety in specific areas like near the ground or around pools.

    Skipping this step can result in fines, do-overs, or delays. It’s a small detail that can cause big problems if ignored.

    7. Know What Goes Into Installation

    Installing patio doors isn’t a simple plug-and-play job. The process usually involves removing the old unit, inspecting the opening for moisture or rot, sealing and leveling the new frame, and making sure everything aligns properly. 

    Then the installer insulates gaps, applies flashing or waterproof barriers, and seals around the edges with caulk or trim.

    A proper installation ensures your door opens and closes smoothly, stays energy efficient, and doesn’t let in water or air. Even the best-quality door won’t perform well if it’s not installed right, so make sure the team doing the work is experienced and certified.

    8. Don’t Overlook Security

    While patio doors bring in light and views, they can also be weak spots if not secured properly.

    • Multi-point locking systems secure the door at several spots along the frame, not just the handle.
    • Anti-lift mechanisms prevent sliding panels from being lifted off the track—something some burglars attempt.
    • Reinforced glass or laminated panels add resistance to forced entry.
    • Smart locks or sensors offer added control and peace of mind, especially when you’re away from home.

    Security upgrades don’t just protect your property—they make using the door feel safer every day.

    9. Consider the Full Cost and Long-Term Value

    A basic patio door setup might cost between $1,000 and $2,500 installed. But once you start adding premium materials, upgraded glass, and custom options, prices can rise to $5,000 or more. 

    You’ll also want to account for installation labor, permits, and potential framing work. That said, the investment often pays off. High-quality patio doors can improve comfort, increase resale value, and cut energy costs—especially when replacing older units.

    Rather than shopping on price alone, focus on value. Spending a little more upfront can mean fewer repairs, longer lifespan, and better performance over time.

    10. Ask the Right Questions Before Hiring

    Hiring the right contractor makes a big difference in the success of your project. Ask direct questions to make sure they’re a good fit.

    • Do they offer in-home measurements and consultations?
    • Is installation included in the price, or is it separate?
    • Will they handle permits and HOA paperwork if needed?
    • What kind of warranty do they provide—on both labor and the product?
    • Can they show examples of previous patio door installations?

    Clear, straightforward answers help you avoid surprises, delays, and subpar results. A trustworthy installer will welcome your questions and explain each step of the process.

    The Bottom Line

    Upgrading your patio doors is a practical improvement—but it only works if you make informed choices. From layout to material to the team you hire, every step matters. When done right, the result is a better-looking home, improved energy performance, and a space you enjoy using every day.

    Ready to get started? Schedule a free consultation with Ameritech Windows and find the patio door that fits your home, budget, and lifestyle.


    GET FREE QUOTE!

    Promo Ending Soon 05-01-2026

    SPRING SAVINGS Event
    Limited Time Only

    Colorado’s Premier Window & Door Specialists
    $395 OFF EACH WINDOW
    $795 OFF EACH DOOR
    $0 DOWN • 24 MONTHS NO INTEREST

    *With approved credit. See representative for details.

    Four-window minimum • New customers only
    Locally owned and operated in Colorado for over 30+ years

    Refresh Your Home for Spring — Lock In Your Savings Today

    Minimum purchase does apply and cannot be combined with any other discounts.*

    Deal is for first time customers only.**


    By submitting this form, I verify that the number provided is my mobile telephone number and I provide my express written consent for Ameritech Windows to contact me at this number via phone, email, and text message (SMS) using automated dialing technology for marketing purposes. I agree to the
    Terms and Conditions and
    Privacy Policy.
    Consent is not a condition of purchase. Message and data rates may apply. To opt out at any time, you may reply STOP to any text message or notify Ameritech Windows by telephone.

  • How to Make Modern Front Entry Doors Stand Out

    How to Make Modern Front Entry Doors Stand Out

    Your front door is one of the first things people notice—and if it’s not adding to your home’s look, it’s probably taking away from it. A modern front entry door can fix that. It sharpens your curb appeal, adds security, and makes your whole home feel more put-together.

    Here’s how to make your front door stand out—and actually feel proud of what people see when they walk up.

    Tip 1: Choose the Right Door Design

    Modern front entry doors come in a range of materials, styles, and finishes. Start by selecting a design that complements your home’s architecture.

    Popular options include:

    • Flush doors – Flat, minimalist, and clean
    • Glass panel doors – Allow natural light while offering a contemporary feel
    • Pivot doors – Large, bold, and often found in luxury homes
    • Steel or fiberglass doors – Durable and sleek, with low maintenance needs

    Avoid styles that clash with your home’s exterior. If your house has a contemporary look, stick with sharp lines and simple finishes.

    Tip 2: Stick to a Clean Color Palette

    The color of your front door can completely shift how your home feels from the street. If you’re aiming for a modern look, lean into neutral or dark, muted tones. 

    Shades like matte black, deep charcoal, navy blue, or even warm natural wood tend to work well. These colors create a clean, understated effect that complements modern design. 

    Loud, bright colors or faux finishes can feel out of place and make the door look dated. Neutrals also tend to age better, which means your door stays stylish for years to come.

    Tip 3: Upgrade the Door Hardware

    Small hardware updates can make a big difference. Swapping out dated knobs or handles gives your door an immediate refresh.

    Look for:

    • Sleek lever handles in black, chrome, or brushed nickel
    • Smart locks with minimalist designs
    • Modern house numbers with clean lines
    • Low-profile doorbells or intercom systems

    Avoid overly decorative or traditional styles that clash with the modern theme.

    Tip 4: Add Sidelights or a Transom Window

    Modern front entry doors don’t have to stand alone. Adding sidelights or a transom window introduces more natural light and makes your entryway feel larger and more open. 

    These glass elements also help balance the space visually, especially on wider front porches or tall door frames. 

    Frosted or etched glass can maintain privacy while still letting in sunlight, making the space feel brighter without sacrificing comfort.

    Tip 5: Install Smart Lock Technology

    Smart locks are a perfect blend of modern function and modern form. Instead of a bulky keypad or a large deadbolt, choose a slim, minimalist lock that integrates with your home’s security system. 

    These locks allow for keyless entry, mobile access, and guest passcodes, all while maintaining a clean appearance. 

    For homeowners focused on both security and design, it’s a smart move that doesn’t take away from the look of the door.

    Tip 6: Use Lighting to Highlight the Door

    Lighting frames your entry and sets the tone at night. It also boosts safety and security. Here are some effective lighting ideas:

    • Recessed lights installed above the doorway
    • Vertical wall lights with geometric designs
    • Motion-sensor or dusk-to-dawn lighting features

    Avoid ornate sconces or lanterns. The simpler the light, the more effective it will be visually.

    Tip 7: Improve Landscaping Around the Entry

    Even a beautifully designed front door can get lost if the surrounding area feels cluttered or unkept. Clear paths, symmetrical planters, and simple greenery can help frame your entry and enhance the modern vibe. 

    Keep the area clean and intentional—remove extra décor, random garden tools, or seasonal clutter that takes attention away from your door. 

    When everything around the door looks sharp, your entry naturally becomes a focal point.

    Tip 8: Consider a Door with Textured or Patterned Glass

    Glass accents aren’t just functional—they add style without overwhelming the design. Here are some recommended options:

    • Frosted glass for privacy
    • Reeded glass for texture
    • Subtle geometric etching for detail

    Patterned glass works best when it follows clean, modern lines and avoids floral or traditional motifs.

    Tip 9: Frame the Door with Bold Materials

    Your door surround can help highlight the entry without changing the door itself. Effective materials include:

    • Black steel framing
    • Wood slats for warmth and texture
    • Stone or concrete panels for contrast

    Make sure the materials are durable and weather-resistant for long-term performance.

    Tip 10: Keep the Area Clean and Uncluttered

    A modern front entry only works if the space around it is just as clean and intentional. Leaving out shoes, packages, tools, or decorative clutter makes the entire area feel less polished. 

    Regularly wiping down the glass and hardware, straightening up any welcome mats, and removing unnecessary items ensures your door remains the centerpiece. 

    It doesn’t take much effort, but the difference it makes is noticeable every time someone walks up.


    Pros and Cons of Modern Front Entry Doors

    Before committing to a new look, weigh the advantages and limitations.

    Pros:

    • Modern front entry doors offer a clean, updated look that can significantly improve your home’s curb appeal.
    • Durable materials like fiberglass and steel are resistant to warping, dents, and weather damage.
    • These doors are often compatible with smart home technology, making it easy to integrate advanced locking systems.
    • You can also customize the finish, size, and glass features to match your personal style and your home’s architecture.

    Cons:

    • Some modern door styles can be more expensive than traditional options, especially when custom designs are involved.
    • The minimalist look may not complement every type of home, particularly those with more classic or ornate architecture.
    • High-end hardware, glass upgrades, and smart technology can increase the overall cost of installation.

    How to Maintain the Look Over Time

    Once installed, a modern front entry door requires regular care to keep its appearance fresh. Here are some tips for ongoing maintenance:

    • Wipe down the surface monthly to remove dust and fingerprints.
    • Check for scratches or wear in hardware and refinish if needed.
    • Repaint or reseal as necessary, depending on the material.
    • Clean glass inserts with streak-free products.
    • Replace weather stripping if air leaks start

    Should You Replace or Refurbish?

    Refinishing may be an option if your current door has good bones but needs a facelift. You might need a replacement if:

    • The material is dented, warped, or deteriorated.
    • The style clashes with your home’s design.
    • You’re missing out on energy efficiency or smart features.

    Modern front entry doors improve insulation, boost resale value, and offer better security features out of the box.


    Final Questions to Ask Before Upgrading

    Before you make the investment, ask yourself:

    • Does the current entry feel outdated?
    • Is my home’s energy efficiency suffering?
    • Could I benefit from smarter security?
    • Will an upgrade increase my curb appeal?

    These answers will help you decide whether to replace, repair, or accessorize.


    Why Ameritech Windows?

    At Ameritech Windows, we specialize in modern entry doors that don’t just meet today’s design trends—they lead them.

    What we offer:

    • Custom-sized doors for unique entryways
    • Durable, energy-efficient materials
    • Optional sidelights, transoms, and smart hardware
    • Wide color and glass selections for a tailored look
    • Professional installation backed by service and support


    Reach Out Today!

    Ready for a better first impression? Contact Ameritech Windows today to explore your modern front entry door options. Our team will help you design an entry that works for your home and stands out for all the right reasons.


    GET FREE QUOTE!

    Promo Ending Soon 05-01-2026

    SPRING SAVINGS Event
    Limited Time Only

    Colorado’s Premier Window & Door Specialists
    $395 OFF EACH WINDOW
    $795 OFF EACH DOOR
    $0 DOWN • 24 MONTHS NO INTEREST

    *With approved credit. See representative for details.

    Four-window minimum • New customers only
    Locally owned and operated in Colorado for over 30+ years

    Refresh Your Home for Spring — Lock In Your Savings Today

    Minimum purchase does apply and cannot be combined with any other discounts.*

    Deal is for first time customers only.**


    By submitting this form, I verify that the number provided is my mobile telephone number and I provide my express written consent for Ameritech Windows to contact me at this number via phone, email, and text message (SMS) using automated dialing technology for marketing purposes. I agree to the
    Terms and Conditions and
    Privacy Policy.
    Consent is not a condition of purchase. Message and data rates may apply. To opt out at any time, you may reply STOP to any text message or notify Ameritech Windows by telephone.

  • Replacement Bow Windows: What They Are and Why Your Home Needs Them

    Replacement Bow Windows: What They Are and Why Your Home Needs Them

    Not loving how your current windows look or how they perform? If they’re drafty, outdated, or just don’t match your home’s vibe anymore, it might be time for a change.

    Replacement bow windows could be the upgrade you didn’t know you needed. They bring in more light, add style, and even give you a bit more space.

    Let’s break down what they are, how they work, and why they might be a great fit for your home.

    What Is a Replacement Bow Window?

    A bow window is a curved, multi-panel window that extends outward from the wall of your home. Most include four to six equally sized window units arranged in a gentle arc.

    A replacement bow window is when you take out an old window—whether it’s a flat unit or an aging bow window—and install a new, upgraded version in its place.

    This upgrade is usually done to:

    • Improve energy efficiency
    • Boost natural light
    • Add character to your home
    • Expand the usable interior space

    Why Homeowners Choose Bow Windows

    If you’re replacing old windows, bow windows offer more than just a style upgrade. They can brighten up a space, add usable room, and even help with energy costs.

    Here are five practical benefits that make replacement bow windows a smart home improvement.

    1. They Let in More Light

    Because of their curved design, bow windows bring in light from several angles. This helps brighten up darker rooms that might only get light from one direction.

    You’ll likely find yourself turning on lights less during the day, which can make the whole space feel more open and welcoming.

    2. They Provide a Wider View

    Bow windows give you a broader, more open view of the outdoors. You can see more of your yard, garden, or street compared to a standard flat window. 

    It’s also a nice way to keep an eye on your kids or pets while they’re outside without needing to step out.

    3. They Add Extra Space

    Bow windows gently extend out from your home, which creates a little more interior space. That extra area is perfect for a window bench, plant display, or a small reading nook. It’s not a huge change, but it adds flexibility to how you use the room.

    4. They Improve Curb Appeal

    From the outside, bow windows add shape and dimension to flat exterior walls. They give your home a more finished, distinctive look—especially if the rest of the design feels plain. This kind of upgrade often makes a strong impression on potential buyers too.

    5. They Can Improve Energy Efficiency

    New bow windows are built with energy performance in mind. You’ll typically get double- or triple-pane glass, insulated frames, and coatings that help reflect heat.

    All of this works together to block drafts and keep temperatures stable, which can help reduce your energy bills over time.


    When Should You Replace a Bow Window?

    Wondering if it’s the right time? Check for the following signs that tell you it’s time to replace your bow windows:

    • Drafts or cold air near the window
    • Rotting or damaged frames
    • Foggy glass or moisture between panes
    • Difficulty opening or closing panels
    • Outdated or mismatched design

    If your current window has any of these issues, replacing it now can prevent further damage and higher energy bills.

    What’s the Difference Between Bow and Bay Windows?

    They’re often confused—but they’re not the same. Bow windows give a smoother curve and a broader view. Bay windows project more sharply and have a more angular design.

    Feature Bow Window Bay Window
    Shape Curved Angled
    Panels 4–6 equal-sized 3 panels (center + 2 sides)
    View Wider, continuous More segmented
    Style Softer appearance Sharper lines

    Choosing between them comes down to your space, your home’s style, and personal preference.

    Common Frame Materials for Replacement Bow Windows

    When you upgrade, you’ll choose the frame material too. Check out the pros and cons of each type below.

    Vinyl

    • Affordable and low-maintenance
    • Good insulation
    • Available in various colors
    • Less custom-looking

    Fiberglass

    • Strong and weather-resistant
    • Energy-efficient
    • Can mimic wood
    • Higher cost

    Wood

    • Warm, traditional look
    • Paintable and stainable
    • High maintenance
    • Vulnerable to moisture

    Composite

    • Made from a mix of wood fibers and polymers
    • Resistant to rot and warping
    • Good energy performance
    • Mid- to high-range cost

    Functional Options: Fixed vs. Operable Panels

    Most bow windows include a mix of fixed and operable window units. Your mix will depend on what room it’s in and how much airflow you want.

    Fixed

    • Do not open
    • More energy-efficient
    • Offers clean views

    Casement

    • Hinged on the side, open outward
    • Great for ventilation
    • Easy to clean

    Double-Hung

    • Both sashes slide vertically
    • Easy to control airflow
    • Suitable for classic home styles

    What About Installation?

    Installing a replacement bow window is not like swapping in a standard window. It’s more complex.

    It requires:

    • Cutting into your home’s wall
    • Ensuring structural support
    • Managing weight and projection
    • Weatherproofing all edges

    This is not a DIY job. Hire a licensed professional to:

    • Assess your home’s structure
    • Match the new window to your siding and interior
    • Ensure a tight, energy-efficient seal
    • Avoid long-term issues like sagging or leaks

    A bad install can cost you more over time than doing it right the first time.

    How Much Do Replacement Bow Windows Cost?

    The cost varies depending on:

    • Window size and panel count
    • Frame and glass materials
    • Customization and hardware
    • Installation complexity

    Average cost: $3,500 to $10,000+ including professional installation.

    Yes, it’s a significant investment—but it’s also one that:

    • Reduces your energy bills
    • Increases home value
    • Adds daily comfort and enjoyment

    Before committing, ask for a detailed estimate and compare energy efficiency ratings.

    Is a Bow Window Right for Your Home?

    It depends on your space and goals.

    Bow windows are ideal if you:

    • Want more light and space in a key room
    • Have a flat window area that needs upgrading
    • Live in a home with traditional or transitional style
    • Can accommodate the outward projection

    But they may not be suitable if:

    • There’s limited exterior space
    • Your wall can’t support the added weight
    • You’re on a tight budget

    A professional installer can check these factors and suggest options that fit your home. Avoid costly mistakes—trust Ameritech Windows for professional, reliable installation that’s done right the first time. Contact us today for a free consultation.

    Get More from Your Home with a Better Window

    Bow windows aren’t just decorative. They change how your home works:

    • More daylight
    • Wider views
    • Additional room
    • Lower energy waste

    If you’re thinking about upgrading a window, replacing it with a bow design can deliver noticeable daily benefits.

    Talk to Ameritech Windows Today

    Ameritech Windows help homeowners choose and install the right replacement bow windows for long-term comfort, beauty, and efficiency. 

    Our experienced team can guide you through every step—from design to installation. Contact us for a free consultation and estimate.


    GET FREE QUOTE!

    Promo Ending Soon 05-01-2026

    SPRING SAVINGS Event
    Limited Time Only

    Colorado’s Premier Window & Door Specialists
    $395 OFF EACH WINDOW
    $795 OFF EACH DOOR
    $0 DOWN • 24 MONTHS NO INTEREST

    *With approved credit. See representative for details.

    Four-window minimum • New customers only
    Locally owned and operated in Colorado for over 30+ years

    Refresh Your Home for Spring — Lock In Your Savings Today

    Minimum purchase does apply and cannot be combined with any other discounts.*

    Deal is for first time customers only.**


    By submitting this form, I verify that the number provided is my mobile telephone number and I provide my express written consent for Ameritech Windows to contact me at this number via phone, email, and text message (SMS) using automated dialing technology for marketing purposes. I agree to the
    Terms and Conditions and
    Privacy Policy.
    Consent is not a condition of purchase. Message and data rates may apply. To opt out at any time, you may reply STOP to any text message or notify Ameritech Windows by telephone.

  • Replacement Bay Windows: Everything You Need to Know Before You Buy

    Replacement Bay Windows: Everything You Need to Know Before You Buy

    Bay windows bring in extra sunlight, give you a cozy spot to sit in, and add a nice touch to your home’s design. But if yours feel drafty, look outdated, or just aren’t working like they used to, it might be time to replace them.

    Here’s a quick breakdown of what to know before buying replacement bay windows—so you can make a smart choice that fits your home and budget.

    What Is A Replacement Bay Window?

    A replacement bay window is a pre-assembled unit that fits into your existing opening, replacing the old window without changing your wall structure. Most bay windows include:

    • A large fixed center window
    • Two smaller operable or fixed windows angled on each side
    • A frame that extends outward, creating a small ledge or seating nook

    The side windows can be casement, double-hung, or fixed. Bay windows are often found in living rooms, dining areas, or master bedrooms.

    They’re different from new-construction windows, which are installed when the wall is built or rebuilt. Replacement windows are designed to preserve your current wall, trim, and framing—saving time and cost.

    When Should You Replace A Bay Window?

    Some homeowners wait until a window fails completely before considering replacement. But delaying repairs can lead to more expensive damage. Watch for these signs:

    • Drafts or cold air – Even with closed windows, you feel temperature changes
    • Foggy or cloudy glass – This usually means the seal between panes is broken
    • Warped or rotting frames – Wood frames that are soft or discolored can signal water damage
    • Difficulty opening or locking the window – Warping or poor balance can cause this
    • Visible gaps or water leaks – These can affect your walls and flooring if left alone

    Even if your window still works, age matters. Most bay windows last 15–30 years depending on materials and exposure. If yours is near the end of that range, a replacement may be the smarter long-term choice.

    Benefits of Replacing Your Bay Window

    Upgrading your bay window does more than fix existing issues. It improves energy efficiency, comfort, and aesthetics. Here’s what you gain:

    • Energy savings – Modern windows reduce drafts and lower heating/cooling bills
    • More usable space – Deeper window seats or storage beneath the sill can be added
    • Improved curb appeal – Fresh materials and cleaner lines can update your home’s appearance
    • Noise reduction – Thicker glass and tighter seals help block outdoor sounds
    • UV protection – New windows can block harmful sunlight that fades flooring and furniture

    These benefits aren’t just cosmetic—they can help improve resale value and reduce maintenance.

    What To Look For

    Choosing a replacement window isn’t just about size and shape. You’ll want to evaluate materials, performance features, and layout options.

    Frame Material

    The frame is what holds the glass together. Here’s how common choices compare:

    • Vinyl – Affordable, good insulator, and virtually maintenance-free
    • Wood – Classic look but needs painting and sealing over time
    • Fiberglass – Stronger than vinyl, doesn’t warp, and resists weather damage
    • Composite – Made from multiple materials for strength and insulation

    Your choice will affect cost, durability, and appearance. Vinyl is the most budget-friendly, while fiberglass and composite offer better performance over time.

    Glass Options

    The glass you choose affects energy performance and comfort. Ask your contractor about:

    • Double-pane vs. triple-pane glass – Triple-pane costs more but adds insulation and soundproofing
    • Low-E coatings – Reflect heat while allowing visible light in
    • Gas-filled panes – Argon or krypton gas between panes improves thermal performance

    If your window gets a lot of sun, these upgrades can make a big difference in how your home feels year-round.

    Window Configuration

    You don’t have to match your old window exactly. Ask yourself:

    • Do you want side windows that open for airflow?
    • Would larger side windows enhance your view?
    • Do you need extra seating or shelving below the bay?

    Customizing your window can improve both function and style—without changing the size of the opening.

    How to Measure Bay Windows for Replacement

    Accurate measurements help avoid costly mistakes. Here’s a quick guide:

    • Width: Measure inside the frame from side to side at the top, middle, and bottom. Use the smallest number.
    • Height: Measure from the top of the frame to the sill on the left, center, and right. Use the shortest measurement.
    • Depth: Measure how far the window projects from the wall (inside trim to outside trim).
    • Angle: Most bay windows have 30°, 45°, or 90° angles between sections.

    Use a steel tape measure and avoid rounding. For best results, have a pro confirm before ordering.

    How Much Do They Cost?

    Pricing depends on the size, materials, brand, and installation complexity. On average:

    • Vinyl bay windows range from $2,000 to $3,500
    • Mid-range options with upgraded glass and frames cost $4,000 to $6,000
    • High-end custom windows (wood or composite) can exceed $6,500

    Labor usually adds $500–$1,000, depending on how much structural work is required. If the wall, sill, or exterior cladding needs adjustment, your total cost will increase.

    To stay within budget, get multiple quotes and ask for a breakdown of materials, labor, and disposal fees.

    What’s Involved In The Installation Process?

    Many homeowners don’t realize how detailed bay window installation can be. Here’s what the process includes:

    1. Inspection – A contractor checks the current window, measurements, and framing
    2. Custom ordering – The replacement window is built to fit your opening
    3. Old window removal – The existing bay is taken out carefully, preserving the opening
    4. Prep and repair – Any damage to framing, insulation, or flashing is repaired
    5. New window install – The unit is secured, leveled, and sealed
    6. Interior and exterior finish – Trim is reinstalled or replaced, and joints are caulked

    Most installs take one full day, but homes with water damage or custom siding may take longer.

    Installers often bring their own tarps and protective gear, but it’s still a good idea to move furniture and valuables away from the work area.

    Should You Replace or Repair?

    Not every issue calls for a full replacement. Here’s a quick guide:

    Repair if:

    • The problem is cosmetic (scratches, dings)
    • The sealant or caulking is failing
    • A single pane is cracked, but the frame is intact

    Replace if:

    • The frame is damaged or rotting
    • The glass is foggy or leaking
    • The window no longer opens, closes, or locks properly
    • Your energy bills are rising due to poor insulation

    You should also consider replacement if you’re planning to stay in your home long-term. A new bay window may pay for itself in comfort, resale value, and lower utility costs.

    Questions to Ask Before You Buy

    Before committing to a replacement, ask your contractor these important questions:

    • Are your products ENERGY STAR certified?
    • Who will install the window—your team or a subcontractor?
    • Is your labor warranty separate from the manufacturer’s?
    • What’s the lead time from order to install?
    • Do you take care of permits, if required?

    You deserve clear answers. If a contractor hesitates or dodges, it may be time to look elsewhere.

    Why Homeowners Choose Ameritech Windows

    Ameritech Windows helps homeowners get the most from their replacement bay windows with trusted service, clear pricing, and professional installation.

    We make it easy to upgrade without the pressure. Want expert help choosing the right replacement bay window? Reach out today; let’s talk!


    GET FREE QUOTE!

    Promo Ending Soon 05-01-2026

    SPRING SAVINGS Event
    Limited Time Only

    Colorado’s Premier Window & Door Specialists
    $395 OFF EACH WINDOW
    $795 OFF EACH DOOR
    $0 DOWN • 24 MONTHS NO INTEREST

    *With approved credit. See representative for details.

    Four-window minimum • New customers only
    Locally owned and operated in Colorado for over 30+ years

    Refresh Your Home for Spring — Lock In Your Savings Today

    Minimum purchase does apply and cannot be combined with any other discounts.*

    Deal is for first time customers only.**


    By submitting this form, I verify that the number provided is my mobile telephone number and I provide my express written consent for Ameritech Windows to contact me at this number via phone, email, and text message (SMS) using automated dialing technology for marketing purposes. I agree to the
    Terms and Conditions and
    Privacy Policy.
    Consent is not a condition of purchase. Message and data rates may apply. To opt out at any time, you may reply STOP to any text message or notify Ameritech Windows by telephone.